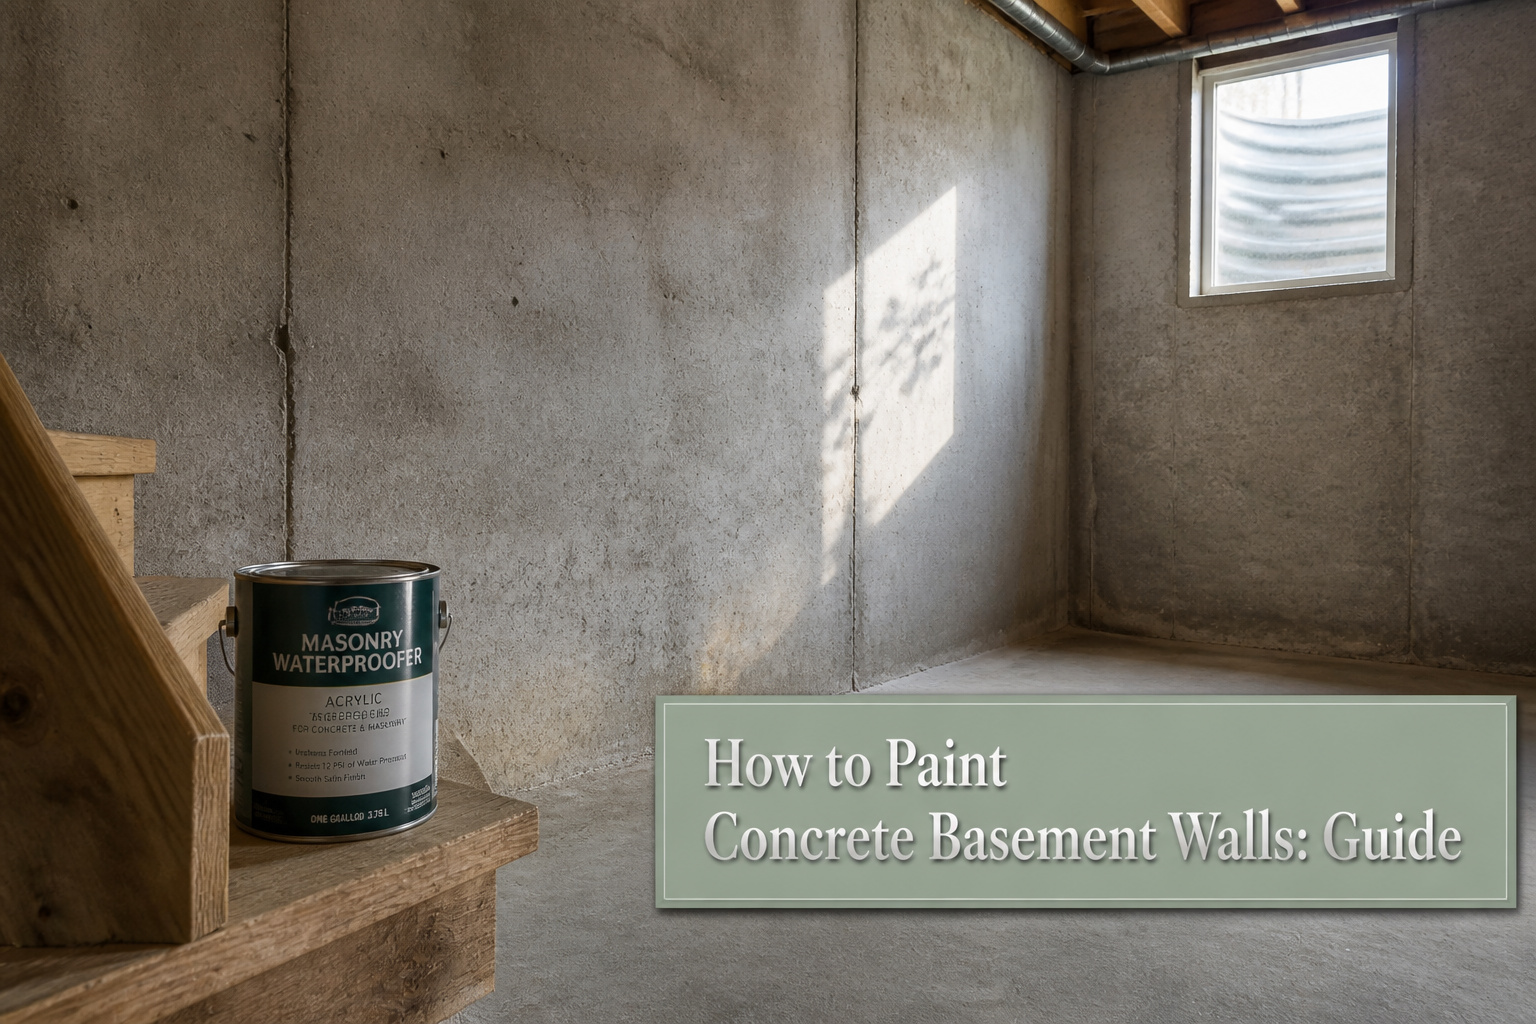
Painting concrete basement walls means sealing porous masonry against moisture that will otherwise blister and peel the finish within months. The catch is that standard latex paint cannot do this alone; it needs a masonry primer or waterproofing base coat beneath it, and even then it only survives on walls that stay genuinely dry. A moisture meter reading at the surface tells you whether your wall qualifies, or whether you are about to trap damp concrete under a decorative layer that will fail by next season.
Inspect the Walls First

Concrete basement walls hide problems that paint only makes worse, so a thorough inspection comes before any brushwork. Run your hand along the surface from floor to ceiling, feeling for damp patches that linger even on dry days. White, powdery efflorescence signals water seeping through the concrete and leaving mineral deposits behind. Dark spots, musty odors, or any fuzzy growth mean mold has already found a foothold. Hairline cracks might be settling, or they might be pathways for moisture; either way, they need attention.
A wall that looks dry can still harbor enough moisture to ruin a paint job. Painting over damp concrete is the fastest way to waste a weekend. A digital moisture meter removes the guesswork, especially on areas that seem fine to the eye but read slightly elevated. If the meter shows moisture, or if you spot efflorescence, mold, or active seepage, stop and fix the water issue first. Paint traps vapor behind it, which leads to blistering, peeling, and worse problems than bare concrete ever caused.
Recommended Products

DIRECT-TO-DAMP WALL PRIMER FOR CONCRETE: Formulated to apply directly on damp walls, this primer bonds to interior or exterior concrete, masonry, and cast‑in‑place surfaces—perfect for basements, cellars, garages, and other moisture‑prone areas
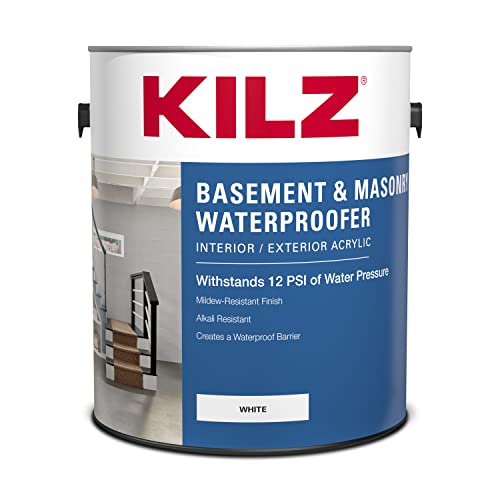
Waterproofing Protection with Nanotechnology: Engineered with advanced nanotechnology to create a powerful water barrier—KILZ waterproofing paint blocks up to 12 PSI of water pressure to help stop water infiltration on concrete and masonry surfaces.
Clean the Surface

Dirt and loose paint on concrete basement walls will ruin a finish faster than almost anything else. Wire brushing is the step most people rush and regret, usually because it feels like make-work when the wall looks basically okay. It is not make-work. Old paint flakes, concrete dust, and the white powdery buildup called efflorescence all block adhesion. A wire brush knocks this loose; follow it with a vacuum to pull the dust out of pores rather than pushing it around.
For the cleaner itself, a masonry scrub brush with concrete cleaner handles mineral deposits that dry brushing will not touch. Mold needs its own treatment, a bleach solution or dedicated mold cleaner, then full drying time before anything else happens.
The pressure washer question comes up because it works so well outdoors. In a basement, it backfires: you are adding water to a space that already struggles with moisture, and concrete soaks it up faster than it dries. That trapped moisture resurfaces weeks later as bubbling paint. Stick to dry mechanical removal and targeted cleaning with a brush, then give the wall real drying time.
Recommended Products
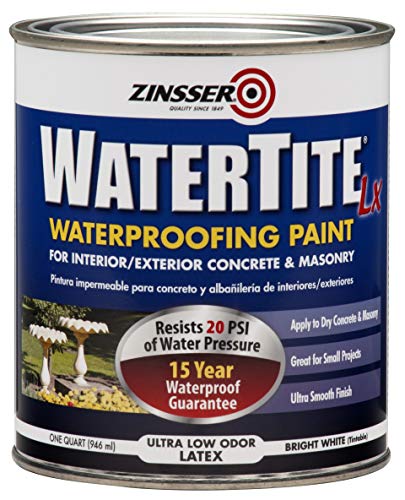
Latex-Base Mold Waterproofing Paint
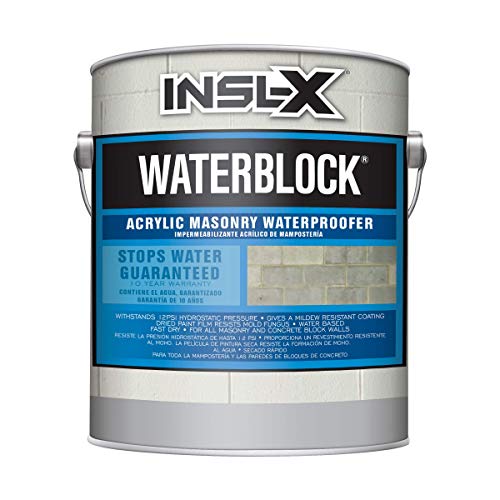
1) Water Based coating for sealing vertical interior and exterior concrete walls. Great for basement walls, foundations and retaining walls.

Clear Mixing Base for use in automotive base coats, One Gallon SMR-3649
Repair Cracks and Holes

A quick flashlight sweep across the concrete usually turns up more damage than the overhead light shows. Hairline cracks, the kind a fingernail barely catches, generally do not need filling before paint if the wall is otherwise sound. A crack that opens wide enough to slide a credit card edge into, or any hole where the concrete has crumbled back to loose aggregate, needs a patch first or the paint will bridge over hollow space and crack within a season.
For those larger gaps, hydraulic cement mixes in a bucket and sets within minutes, which is useful for stopping active leaks but leaves a rough, fast-cure surface. It is meant for structural repair, not fine finishing. Masonry filler works slower and feathers out smoother, which matters when the patched area will sit under a thin coat of primer. I have seen walls where every crack was packed with hydraulic cement and the texture telegraphed straight through two coats of paint. Press filler firmly into the crack with a putty knife, overfill slightly, and sand once cured so the patch does not read as a ridge. Big holes may need a second layer after the first shrinks.
Recommended Products

WATER LEAK DETECTOR detects relative moisture content from leaks and flooding

WOOD MOISTURE METER: Prevent water and moisture build-up with our humidity reader. It can quickly determine what level of remediation is needed to keep your family safe. High levels of dampness that go untreated can cause hazardous living conditions.
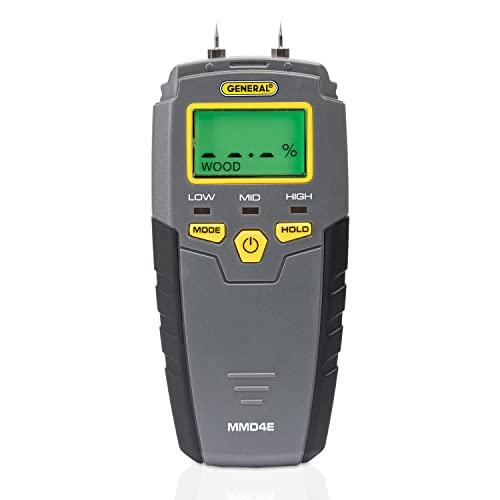
HUMIDITY SENSOR: Our handy meter tool can quickly determine what level of remediation is needed to keep your family safe from black mold. High levels of dampness that go untreated are the leading cause of harmful fungus growth in the home.
Etch When the Surface Is Too Smooth

Poured concrete walls are typically denser and smoother than block, which helps with water resistance but works against paint adhesion. Etch when the surface is too smooth for primer to grip. A concrete etching solution opens the surface pores so the coating can actually bond instead of peeling away in sheets.
This step matters most on poured concrete or walls that were previously sealed. Rough block usually has enough texture already. For slick surfaces, liquid etch products clean and brighten in one pass and are a safer alternative to muriatic acid, which is highly corrosive. Remove any old paint first, let the wall dry fully after cleaning, then apply the etcher according to the product timing. Rinse thoroughly and let it dry again before priming. Skip this on rough masonry, but on smooth concrete it is the difference between a finish that lasts and one that flakes within a season.
Recommended Products
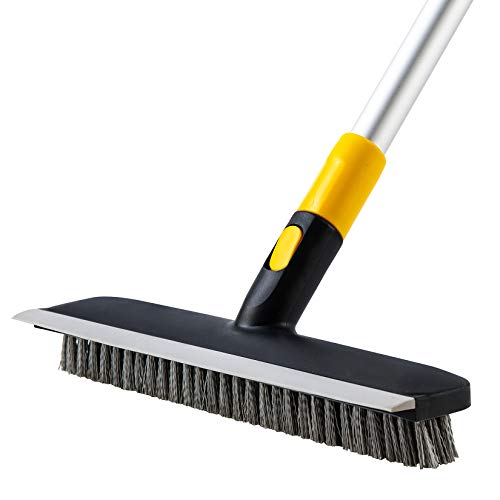
Floor Scrub Brush 2 in 1 Scrape and brush Push Broom Effective, Easy and Save Effort Brush and scraper 2 in 1 design floor scrub brush with stiff bristle and rubber squeegee; Strong cleaning ability; Brush and scrape steps to easily remove the stain, stubborn grime, dirty water, and dust; Improve effectiveness when you doing housework

MULTI PURPOSE USE: Tires, car, truck, grills, spokes, bumpers, wheel well, concrete, decks, house, pots
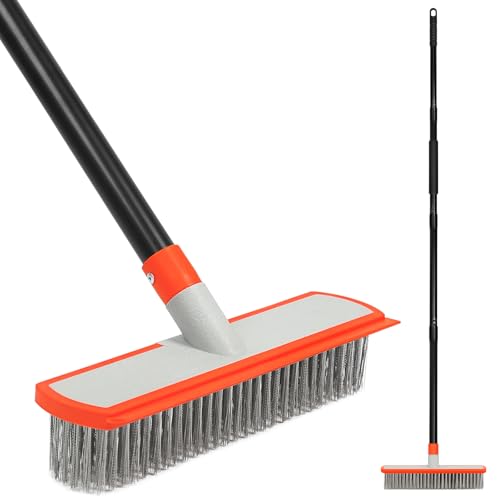
【Stainless Steel Floor Scrubber】 With tough and durable stainless steel bristles, this heavy duty scrub brush tackles stubborn moss, weeds, and grime on concrete surfaces without shedding or bending, ensuring long-lasting performance as a reliable concrete broom.
Prime Before You Paint

The primer you choose matters as much as the paint itself. Standard wall primer is a different product entirely; it sits on drywall and never meets the alkali pull of cured concrete. For basement walls, you need a masonry primer or sealant formulated for below-grade surfaces. This seals the pores, bonds with mineral substrates, and gives the topcoat something to grip.
Skipping this step is the difference between paint that lasts ten years and paint that peels in two. The sources are unanimous on that timeline, and it matches what I’d expect: bare concrete wicks moisture inward, and paint without a masonry underlayer loses adhesion from the back side. You won’t see the failure until bubbles form, by which point you’re stripping and starting over.
Apply it with a roller on the broad faces and a brush at corners and edges, especially where old paint peeled or you patched. Let it dry fully before the color coat. The extra day of waiting is cheaper than the do-over.
Recommended Products

TACKLES TOUGH MOLD STAINS INSTANTLY: RMR-86 PRO is our most powerful mold stain remover that utilizes special deep penetrating surfactants with a unique hybrid of pure sodium hypochlorite to remove stubborn stains in just seconds.

BRIGHTER RESULTS INSTANTLY: Noticeably brightens indoor and outdoor surfaces, removing black mold and mildew stains as you watch, with no scrubbing or pressure washing required for fast, visible results
Apply Two Coats

Two thin coats of masonry waterproofing paint will cover roughly one gallon per 300 square feet. The first coat seals the concrete; the second gives you the uniform color and the moisture barrier you’re actually after. Some basements need a third if the first pass looks patchy once it dries, but two is the standard target.
The can will likely say the paint is dry to the touch in four to six hours. Ignore that. Basements run cooler and more humid than the room where the manufacturer tested, so waiting a full 24 hours between coats is the safer call. Rushing it risks trapping moisture underneath, which shows up later as bubbling or soft spots you have to sand back and redo.
Cutting in the edges matters more down here than it does upstairs. The junction between wall and floor, around windows, behind pipes, these are the places where moisture creeps in first and where a roller can’t press paint into every pore. Brush those edges twice, once with each coat, and roll the field in between. On the second coat, roll perpendicular to the first direction; it catches the thin spots the initial pass missed and keeps the finish from reading striped under basement lighting.
Recommended Products

Ames Blue Max White is a strong and highly adhesive elastomeric liquid rubber waterproofer with 900% elongation that resists cracking and peeling. Blue Max White is ideal for waterproofing below-grade and insulated concrete foundations, basements, and underlayment.
Let It Cure

Painted concrete basement walls feel dry to the touch in as little as four to six hours, but that surface dryness is not the same thing as a cure. The paint film underneath is still soft, still bonding chemically with the concrete, and still vulnerable to anything pressed against it.
Full curing takes anywhere from seven days to four weeks, depending on the paint type and how much humidity lingers in the basement. During that window, the wall can be scuffed, peeled, or imprinted by furniture backs without much resistance at all. A cured film, by contrast, has hardened into something that takes abrasion without marking and resists the moisture that basements always hold.
The difference you can test with a fingernail at an edge: dry paint will smudge or gouge; cured paint will not. Until it passes that test, keep furniture a few inches away and wait to hang anything that would compress the surface. The basement’s humidity works against you here, so running a fan to move air helps the process along without rushing it.
Recommended Products

This high-quality, acrylic latex water-base interior/exterior paint offers excellent hiding properties with great adhesion and water repellency on textured interior and exterior surfaces
Masonry Waterproofing Paint

Masonry waterproofing paint is what most basements actually need. It is thick, made for masonry, and designed to seal pores while resisting minor hydrostatic pressure from the soil outside. Drylok Extreme withstands up to 15 psi of water pressure, which covers the occasional dampness most below-grade walls see. This is the safest choice if you are not completely sure the walls will stay dry year-round.
The win here is straightforward: it keeps water out without requiring a perfect moisture situation first. The limit is just as real. Waterproofing paint traps water inside the wall if it is not installed correctly, and in older homes that need to breathe, that trapped moisture can lead to spalling or mold. If your house is pre-1970 or you already see efflorescence, a breathable mineral finish may serve you better than a vapor barrier you cannot see through.
Epoxy Paint

Epoxy paint is the most durable option for concrete basement walls, but that toughness comes with trade-offs that matter on a weekend timeline. A two-part kit mixes resin with hardener to form a non-porous, waterproof surface that resists water, chemicals, and abrasion. The finish handles foot traffic and wear far better than standard masonry paint, which is why it dominates garage floors and basement floors in high-use spaces.
The working time is short once the parts are mixed, and the fumes are strong enough that a respirator and open windows are non-negotiable. Mistakes in application are harder to fix than with latex or acrylic; the surface shows brush marks, roller laps, and drips with little forgiveness. Cost runs higher than masonry paint, and the coating does not breathe. Moisture trapped behind it can push the finish to peel or blister, especially where humid summers and cold winters drive vapor through the wall.
That vapor-drive risk makes epoxy a poor first defense on bare, damp concrete. It works best as a topcoat over existing latex masonry paint on already-dry walls, or as the primary finish in spaces that take real abuse. A home gym, workshop, or basement floor that sees tools, weights, and regular traffic justifies the hassle. For standard basement walls with seasonal dampness, the durability gain is not worth the moisture gamble. Sherwin-Williams notes that epoxy’s flexibility helps it stretch and shift with concrete as temperatures change, a property that protects the finish where thermal movement is constant.
"Epoxy paint is also highly durable, making it an excellent solution for high-traffic areas that require a more durable wall coating."
For walls that will see scuffs, bumps, and regular contact, that durability is the deciding factor. For walls that simply need to look clean and resist moderate moisture, the application headaches and breathability limits make epoxy overkill.
Acrylic Latex Paint

Acrylic latex wall paint is the cheapest way to coat concrete basement walls, but that low price comes with a hard condition: the surface has to be bone-dry and properly primed first. On raw concrete, regular latex is not waterproof. Moisture vapor can pass straight through it, and even slight dampness will make the paint blister or peel within a few seasons.
The only reliable path is a masonry primer or block filler on bare concrete, then the latex topcoat. Some homeowners skip this, and the result is poor adhesion and early failure. Another approach that works better is using latex as a decorative layer over a masonry waterproofer like Drylok Extreme. You get the seal underneath and the color freedom on top.
If the basement has ever smelled musty or shown damp spots, latex alone is the wrong choice. Expect to repaint every 3–5 years if you use it without that sealed base coat, and never use oil-based paint on basement masonry. The alkalinity in concrete can chemically attack oil paint, causing it to saponify, or "soap out." Modern acrylic latex formulas resist alkalinity better, but they still cannot handle moisture on their own.
Mineral-Based Paint

Mineral-based paint sits in a narrow space between standard masonry coatings and full waterproofing systems. Silicate and limewash formulations let concrete walls expel water vapor instead of trapping it behind the surface, which matters in older homes where some moisture migration is inevitable and you cannot fully solve the water problem. That breathability prevents the spalling and mold growth that happen when vapor gets locked inside.
The tradeoffs are real. These paints run more expensive than acrylic options and harder to find at a typical hardware store; I have had better luck ordering silicate systems online or through specialty suppliers. The finish also looks different, flatter and more matte than the satin or eggshell most people expect from interior paint. Some homeowners love that chalky, old-world texture. Others see it and assume the job is unfinished.
For a damp basement where exterior waterproofing is not in the budget, mineral paint is often the better compromise than trapping moisture with a film-forming coating. It is not a solution to active leaks; if water is pushing through the wall, paint of any kind will fail. But where humidity is the enemy and the wall just needs to breathe, this is the one basement-specific product that actually lets it.
Standard Latex Paint

Standard latex paint is what most of us already have in the garage from the last bedroom refresh, which makes it the first thing people reach for when they stare at unfinished basement walls. It only belongs there if the concrete is bone-dry and has been sealed first with a masonry waterproofer. Without that base coat, vapor moving through the wall will blister and peel the finish within months, sometimes weeks if hydrostatic pressure is present. Latex also lacks the mildew resistance that below-grade spaces need, and it does nothing to help the wall expel moisture; it simply sits on top, trapping what it touches and feeding mold when conditions turn. The rare basement where this approach survives is one that has never smelled musty, never shown damp spots, and sits on well-drained soil with a functioning perimeter system already in place. Even then, you are buying custom color options, not durability, and you are accepting a shorter lifespan than masonry-specific alternatives would give you.
Moisture Control

Moisture will ruin basement paint faster than almost anything else, so the walls need to pass three separate tests before a brush ever touches them. A simple hand-press against the concrete tells you plenty: cool and damp means condensation, which a dehumidifier running at 40–50% relative humidity usually fixes. White powdery efflorescence or dark patches that show up after rain point to seepage or active leaks, and paint is not the repair for those. For that middle case where the wall looks dry but you are not sure, tape a square of plastic sheeting tight against the concrete and wait a day. Moisture trapped behind it means the concrete is still breathing water vapor, and primer will only seal that problem inside. Sources differ on the ceiling: some say keep humidity below 60%, but I would aim lower. A dehumidifier is cheaper than stripping failed paint, and a basic digital hygrometer costs less than a gallon of primer. If you see wet streaks or trickling after storms, stop and fix the drainage, the grading, or the crack first. Paint is the finish layer, not the waterproofing system, and putting it over active water pressure can hide the damage while it keeps growing underneath.
Common Problems and How to Avoid Them

Peeling paint on a basement wall usually starts at the edges and works inward, leaving curled strips that catch on your sleeve. That failure means moisture got underneath, either because the concrete was still damp when you painted or because water is still pushing through from outside. If the peeling is widespread, the coat is compromised and you will need to strip it back to bare concrete before starting over. Small patches can sometimes be sanded, sealed, and touched in, but only after you have found and stopped the source of the water.
Bubbling looks different: raised blisters that may crack open to reveal wet or powdery material underneath. These form when water vapor trapped behind the paint has nowhere to go. Heavy bubbles mean the finish is acting as a vapor barrier instead of letting the wall breathe, a problem common with oil-based or non-breathable coatings on below-grade concrete. The fix is almost always removal. Epoxy or silicate-based paints are less likely to fail this way because they allow some vapor transmission while still blocking liquid water.
Mold growth shows as dark spots or fuzzy patches, often in corners or behind furniture where air sits still. It means the relative humidity in the basement is too high, or water is actively seeping through. Paint over mold and you have painted over the symptom. Kill it with a fungicidal wash, run a dehumidifier to bring humidity down, and do not apply new coating until the wall reads dry on a concrete moisture meter. If you skip the meter, you are guessing, and concrete below grade can feel dry to the touch while still holding enough vapor to ruin your work within months.
Paint Comparison

Choosing between paint types means weighing what your walls actually need against what your tolerance is for prep work. After reading through the recommendations that surface for this project, the tradeoffs become clearer.
| Paint Type | Moisture Resistance | Durability | Breathability | Application Difficulty |
|---|---|---|---|---|
| Masonry waterproof paint | High | Good | Moderate | Low |
| Epoxy coating | Very high | Excellent | None | High |
| Elastomeric masonry paint | High | Very good | High | Moderate |
| Mineral-based (silicate/limewash) | Moderate | Good | Very high | Moderate |
| Standard acrylic/latex | Moderate | Moderate | Moderate | Low |
Masonry waterproof paint hits the balance most homeowners want: it repels moisture without demanding a chemistry set to apply. Epoxide systems demand mixing resin and hardener, carry strong fumes, and trap vapor that can blister the finish if your wall has any seasonal dampness behind it. That same non-porous shell makes epoxies unbeatable for a dry basement turned gym or workshop, but a risky first coat on below-grade concrete.
Breathability matters more than the marketing suggests. Older homes especially need finishes that let walls exhale; sealing them tight can push spalling and mold deeper into the structure. If your basement shows only occasional summer humidity, a breathable elastomeric or mineral-based paint saves you from problems the epoxies hide until they peel.
Frequently Asked Questions
Can I paint damp walls in the basement?
No. Painting over damp concrete is the fastest way to waste a weekend, because paint traps vapor behind it and leads to blistering, peeling, and worse problems than bare concrete ever caused. A wall that looks dry can still harbor enough moisture to ruin a paint job, so use a digital moisture meter to remove the guesswork. If the meter shows moisture, or if you spot efflorescence, mold, or active seepage, stop and fix the water issue first.
How long does basement wall paint last?
With proper prep and a masonry primer underneath, paint on basement walls can last up to ten years. Skipping the primer is the difference between paint that lasts ten years and paint that peels in two, because bare concrete wicks moisture inward and paint without a masonry underlayer loses adhesion from the back side. You will not see the failure until bubbles form, by which point you are stripping and starting over.
What is the best paint for basement walls?
Masonry waterproofing paint is the safest choice for most basements, especially if you are not completely sure the walls will stay dry year-round. Drylok Extreme withstands up to 15 psi of water pressure, which covers the occasional dampness most below-grade walls see. Epoxy paint is the most durable option but works best on already-dry walls or high-traffic spaces; mineral-based paint suits older homes that need to breathe; standard latex is only appropriate over a sealed base coat.
How do I prevent paint failure in basements?
Control moisture first, then prep the surface thoroughly, then use the right paint. That means three separate tests before painting: a hand-press for dampness, a plastic sheet taped to the wall for a day to catch hidden vapor, and a concrete moisture meter for the final check. Clean with a wire brush and vacuum, patch cracks properly, prime with a masonry primer or sealant, and apply two thin coats of masonry waterproofing paint with a full 24 hours between coats.
How many coats are needed for basement wall painting?
At least two coats are needed for adequate coverage and durability. Two thin coats of masonry waterproofing paint cover roughly one gallon per 300 square feet. The first coat seals the concrete; the second gives you the uniform color and the moisture barrier you are actually after. Some basements need a third if the first pass looks patchy once it dries, but two is the standard target.