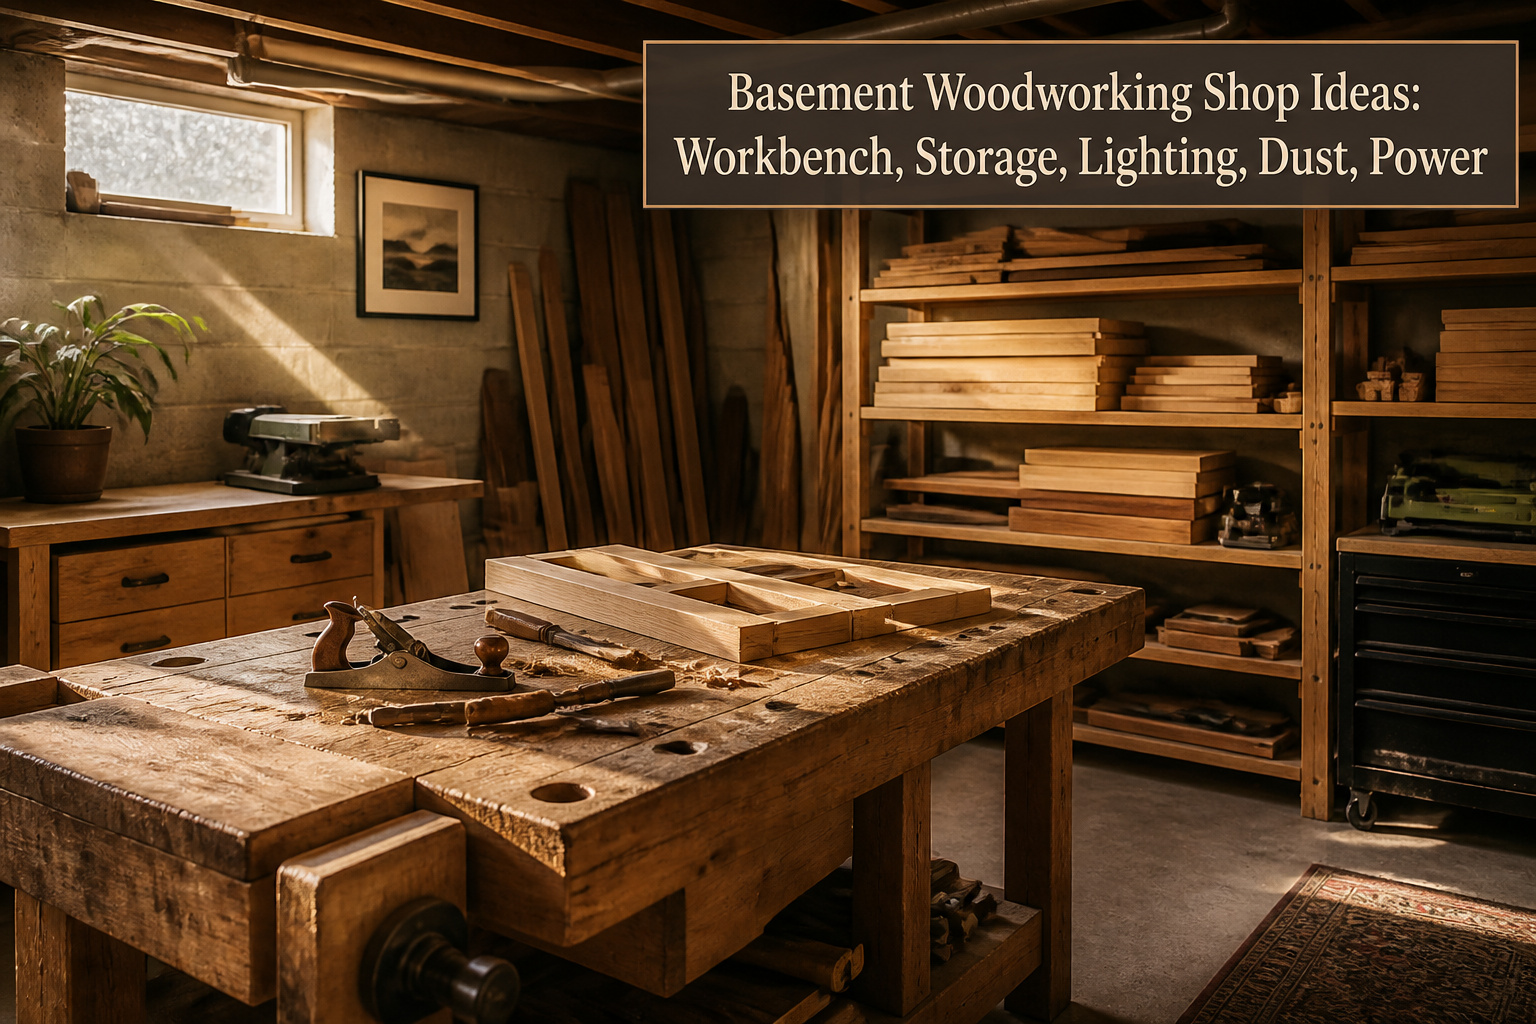
A basement woodworking shop is a workshop built into the lowest level of a house, and the single condition that separates the ones that get used from the ones that get abandoned is whether the owner solved lighting and dust before the first project. Most basements start with one overhead bulb and a shared 15-amp circuit, which means shadows hide miscuts and a running dust collector trips the breaker mid-rip. The author learned this after his first 4-foot LED left walnut grain looking green under 5000K light, and a shop vacuum alone coated the furnace filter upstairs with fine dust he could not see settling.
Workbench Ideas

A workbench is the anchor of any basement shop, and the right choice depends on whether the space doubles as storage or stays dedicated year-round. Stationary benches built from two-by lumber and a solid-core door offer mass that refuses to shift while hand-planing, but they demand permanent real estate most basement layouts cannot spare. Fold-down wall-mounted designs solve this by swinging flat against concrete when not in use; the best models lock at standard height and fold with tools still clamped in place.
Adjustable height matters more than most woodworkers expect. A bench set low for hand-tool work becomes a backache during assembly tasks, and a tall assembly table is useless for routing. Crank mechanisms add cost, but a simple row of peg holes drilled every two inches through the legs lets you reposition the top in minutes. Multi-function benches, the kind with a built-in router plate or removable vise sections, earn their keep in tight footprints where one surface must serve as jointer outfeed, assembly table, and finishing station. The tradeoff is rigidity; a top that accepts inserts rarely matches the dead-flat stability of a single slab. For a first basement shop, a basic fixed bench with a replaceable hardboard surface teaches what you actually use before committing floor space to something permanent.
Recommended Products
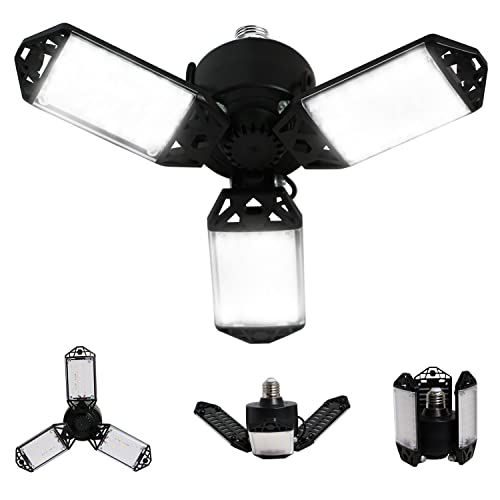
☀【Upgrade Garage Light -- 80W Super Bright】: MeiqiLS deformable led garage lights with 3 adjustable LED panels, high brightness 8000 lumen output in 6500K daylight, CRI80+. It features LED technology, really shine without dead ends.

★【150W Super Bright Led Garage Lights】: QiyuanLS garage light ceiling led with 4 adjustable High-strength ABS LED panels and 1 center panel, 104pcs top quality led chips that total 15000 Lumens, 6500K, CRI80+, daylight garage lighting, providing the best indoor lighting experience. There will be not dim area in the garage and no shadows.

Super brightness: 6500K cool daylight white, 4400 lumens of brightness—brighter than 5000K. These 4ft led shop lights only consume 40W while providing the bright illumination with 250W (6 times more than conventional fluorescent lights). It is an amazing LED performance of 110 lm/w, which can save you money on electricity. The clear, comfortable 6500K light is easy on the eyes, so you can work for hours without eye strain.
Storage Solutions

Wall-mounted racks eat up zero floor space, which matters when a basement shop might be ten by twelve feet of actual working room. I put the chisels and hand planes on a shallow rack first thing; anything with a sharp edge stays where I can see it, not buried in a drawer. Pegboards behind the bench handle the rest: squares, clamps, marking gauges, all hung where my hand lands without looking. The hole spacing is standard, so hooks move in about thirty seconds when a project changes.
Shelving runs high on the end wall, stacked with cutoff bins and finishing supplies I reach for less often. A rolling cart slides under the bench when I am not mixing shellac or laying out hardware. Keep the cart narrow enough to pass a framed wall without nicking trim, because you will move it more than you expect. Cabinets are the last addition, not the first. They hide dust and look tidy, but every closed door adds a step between you and the tool. Start open, go closed only for the things that rust or spill.
Recommended Products

【2200 LBS Heavy Duty Workbench with Adjustable Height】Built with a reinforced steel frame and a 1-inch thick engineered wood tabletop, this heavy duty workbench supports up to 2200 lbs on the main surface and 500 lbs on the lower shelf. The adjustable legs provide a working height from 27.9 to 43.4 inches, making it suitable for woodworking, repairs, assembly, crafting, and garage projects.
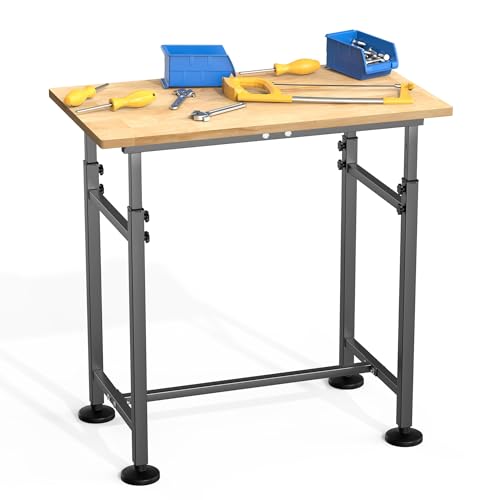
Multi-Purpose Workbench: Ideal for garages, workshops, basements, laundry rooms, and studios. Perfect for woodworking, repairs, gardening projects, crafting, or as a sturdy table for home or professional use

HEIGHT ADJUSTABLE HAND CRANK DESIGN:Customize your ideal working position with the smooth hand crank height adjustment system. Easily raise or lower the work surface to reduce strain and improve comfort for woodworking, crafting, repairing, and DIY projects.
Lighting Options

Basements rarely offer enough light for safe joinery. The overhead bulb that came with the house leaves your workbench in shadow by late afternoon, and shadow is where miscuts happen. Overhead shop lights on a separate switch, spaced so the beam from each overlaps the next, give you a baseline bright enough to walk the space without guessing where the table saw sits.
Task lighting fills what overhead coverage misses. A gooseneck lamp bolted to the bench back rail puts raking light across your layout lines; without it, pencil marks on dark walnut disappear. I learned that the hard way on a dovetail joint that looked straight until I carried it upstairs.
If you have a window, even a small one, keep it unobstructed during daylight hours. Natural light reveals grain and color better than any fixture, and it keeps the space from feeling like a cave. For evening work, pair your overheads with directed spots: one at the bench, one at the miter station, one at the assembly table. Three zones, three switches, so you light only where you stand.
Color temperature matters more than wattage alone. A bulb too warm turns maple yellow; too cool, and every board looks like hospital linoleum. Something in the middle, around 4000K, reads the wood true.
Recommended Products

Versatile Extra Work Space: Collapsible workbench can transform any space into a workspace. It can be used as a dining or desk space, crafts table, or laundry folding area. Adds workspace while keeping room for storage

Eco-Friendly: The garage workbench tops are made of natural pine wood, with a clear texture and not prone to deformation.

【MULTI-PURPOSE APPLICATION】: The wall shelf brackets could be mounted on the wall to work as shelfs with board on it, can allow more DIY space in your garage, kitchen, shop, stores, workshops, boats, motorhome, backyard, trailer, room, kitchen, balcony, bathroom, etc.
Dust Collection Systems

Basements trap everything, and sawdust has nowhere to drift but back into your lungs. A dedicated dust collector with a cyclone separator handles the volume that a standard shop vacuum chokes on within minutes, pulling fine particles before they settle into every corner of the house. The separator keeps the filter from clogging, which means the motor works less and the suction stays honest through a full afternoon of cutting.
Shop vacuums have their place. A compact canister with a hose adapter follows you to the miter saw or router table for quick cleanup between cuts, and the right fitting on a sander captures more dust at the source than any overhead system. The mistake is treating one tool as enough.
In a basement with no natural air exchange, airborne dust lingers hours after the tool stops. That is the health case for layering both systems, not choosing between them. A ceiling-mounted air filtration unit cycling the room volume every ten minutes catches what the collector misses, and the difference shows in morning light through the window, when you would otherwise see particles still hanging above the bench.
Recommended Products

5.7-amp brushed motor combined with the 6-inch impeller moves up to 660 cubic feet of air per minute

Circulate up to 1,300 cubic feet of air per minute

【HIGH EFFICIENCY】 Our DEWALT high efficiency dust separator can capture wood chips and other debris before they enter your vacuum cleaner, reducing suction loss due to clogged vacuum filters. Saves you the cost and time of expensive filter and dust bag replacement.
Power Supply Considerations

Most basements start with one lonely outlet and a single overhead light, which is nowhere near enough once you plug in a table saw, dust collector, and charger for your cordless drill. I learned this the hard way after tripping a breaker for the third time in one afternoon and realizing the whole basement shared a 15-amp circuit with the upstairs hallway.
Plan for more outlets than you think you need, spaced every six to eight feet along every wall. A dedicated 20-amp circuit for your major tools prevents the lights from dying mid-cut, and a separate 240-volt line opens up options for larger equipment down the road. A subpanel in the shop itself saves you from running back upstairs to reset breakers and lets you add circuits later without tearing into finished walls.
Power strips and extension cords are a temporary fix that becomes permanent in too many shops. They create trip hazards, reduce voltage to your tools, and often violate code. If the basement has an old fuse box or knob-and-tube wiring still active somewhere in the walls, bring in an electrician before you move a single machine in. The cost stings, but a shop you cannot run at full power is not a shop at all.
Recommended Products

METAL NAILBOARD: Our peg board panels are made of high quality steel with a powder coated finish that is strong, scratch resistant and easy to clean. Each small pegboard has a weight capacity of up to 50 lbs. This is a favorite product for tool organizers, DIY enthusiasts, store owners and office workers.

Value Package: Our pegboard tool organizer comes with 120pcs pegboard accessories,16 different type pegboard hooks including 5pcs pegboard bins, curved hooks, angled hooks, straight hooks, and ring tool holder, multi tool rack. 49pcs of them are peg locks for fixing hooks

Versatile Pegboard Accessory – A huge step up from peg board drill hooks, The MADD Tools pegboard drill holder rack is designed to fit up to 3 drills, making it a versatile addition to your pegboard accessories. Universal drill holder accommodates all brands and sizes of drills.
Ventilation

Basements trap everything you put into the air. Sawdust hangs at breathing height, finishes off-gas for hours, and the concrete walls that keep moisture out also keep fumes in. A basement shop needs active air exchange, not just a fan pointed at your work.
I learned this the hard way after a long evening of cutting MDF with an orbital sander running nearby. The headache started before the work was done, and the fine dust settled on shelves I had cleaned the day before. That dust behaves differently underground; without natural airflow, the smallest particles stay suspended and find their way into the house above through any gap in the floor joists.
What convinced me, reading through the warnings others shared, was how many mentioned the same pattern: they noticed the air quality problem only after symptoms showed up. You cannot see finish fumes accumulating, and by the time you smell them strongly, the concentration has already been high for a while.
For most weekend woodworkers, the practical move is drawing fresh air in at one end and exhausting it at the other, with enough volume to create actual exchange rather than just stirring the same air around. The specifics depend on your basement’s layout, window access, and whether you share HVAC with the living space above, which is why I stop at the principle rather than pretending one kit fits all.
Recommended Products

Energy Saving Shop Lights: 40W shop light with 40 LEDs produces 5400LM 6000K cool white daylight. Experience clear and bright lighting while maintaining energy saving up to 80%

Brighter LED Shop Light: With 40pcs high-efficiency LEDs, this shop light produces 5400 Lumens of 6000K daylight white light, which is brilliant enough to illuminate your garage or workshop, ensuring clear visibility of dark corners. Note: No Dimmable, No Linkable, No Waterproof

5000K 10000LM Daily Bright: LED shop lights 4FT are 10000 lumens output at 5000K daylight, 84W, low power consumption and efficient heat dissipation
Safety Equipment

A basement shop traps everything you create. Sawdust hangs in the air longer than it would in a garage with a rolling door, and the concrete walls reflect noise back at you instead of letting it drift away. That enclosed quality makes eye and lung protection non-negotiable from the first cut, not after you notice the irritation.
Goggles that seal around the edges matter more down here than in a drafty outbuilding. The fine dust stirred up by a sander or a tablesaw circulates instead of escaping, and regular glasses leave gaps where particles slip through. A dust mask rated for fine particulates serves the same purpose for your breathing. The disposable ones are enough for most weekend work; a respirator with replaceable cartridges becomes worth the cabinet space if you are cutting MDF or sanding finishes regularly.
Hearing protection slides onto the same list once you add a planer or a router. The basement amplifies the high-pitched whine those tools make, and the damage accumulates whether you notice it during the cut or not. I keep a pair of cheap earmuffs hanging on a hook beside the light switch so the step is harder to skip than to take.
Recommended Products

PLEASE RECOGNIZE THE MUWOOD BRAND WHEN PURCHASING! SOLID RUBBER WOOD AND THICK STEEL: The tabletop is made of 48“ x 24” x 1.2” solid rubber wood. It is finely coated and polished for long life and easy cleaning. The steel is 1.3mm thick.Precision cutting process makes this workbench with 2000LBS weight capacity, ideal for auto repair projects and gardening.

[Versatile Folding Workbench] - Switch between a sturdy work table and a fold-down sawhorse with 2x4 brackets. Two units can interlock to create an expanded workspace, ideal for jobsites or mobile use.

【Solid Wood & Reinforcing Rod】 60" x 24" solid rubber wood top with metal frame, the weight load capacity of this heavy duty workbench over 2000 lbs, the extra support rod to make the table more stable horizontally
What I Learned from My First Basement Shop

The first thing that went wrong was the light. I hung a single 4-foot LED fixture directly over the workbench and called it done. Two evenings in, I was squinting at pencil lines on walnut, shadows falling exactly where I needed to see. Basement ceilings eat light; you need about triple what feels right at first, and the color temperature matters more than the lumens number on the box. Mine ran 5000K, that cold blue-white that makes every board look slightly green. Swapping to 4000K and adding side lighting fixed the color, but I had already cut one joint crooked from misreading the grain.
Dust was the second lesson, and the more expensive one. A shop vacuum on wheels pulled chips off the bench well enough, but the fine stuff stayed airborne, coating the furnace filter upstairs and leaving a film on the water heater pilot light cover. A ceiling-mounted air filtration unit ran about $180, and the difference showed up in the first week: less sneezing, less wiping, and the basement stairs stopped carrying that pale sawdust footprint up to the kitchen.
Power came last because it worked fine until it didn’t. One 15-amp circuit handled the router and the shop light together, but adding the dust collector tripped the breaker mid-cut on a raised-panel door. Splitting the load onto two circuits cost an afternoon and about $40 in wire and outlets. The panel was close, which saved me; older basements with fuse boxes or distant panels would need an electrician, and that changes the budget entirely.
Recommended Products

【𝑫𝒖𝒓𝒂𝒃𝒍𝒆 𝒂𝒏𝒅 𝑺𝒂𝒇𝒆 𝑪𝒐𝒏𝒔𝒕𝒓𝒖𝒄𝒕𝒊𝒐𝒏】Our wall mounted Folding table is made of 72”W x22”D x1.2” thick solid wood and finished with eco-friendly paint,it’s not only sturdy but also kind to the environment.Rounded corners add a layer of safety,making it perfect for homes with children.
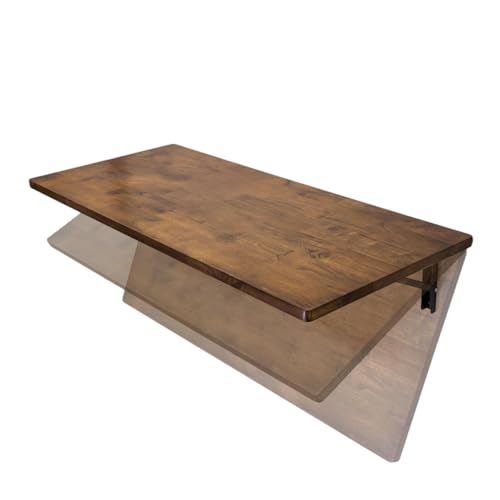
WALL-MOUNTED FOLDING WORKBENCH – Create a sturdy foldaway work surface for garage, workshop, laundry, RV, apartment or home office use. Built for buyers needing folding workbench, folding work bench, folding work table, foldable work table, foldable work bench, folding work bench table, fold down work bench, wall mounted folding work table and wall mounted workbench utility in one compact 40 x 18 in setup.

Complete Kit Included: The package contains everything needed for assembly, including the solid workbench top, folding brackets, and mounting hardware—no extra purchases required
Budget and Timeline

A basement woodworking shop can come together for under a thousand dollars if you build the workbench yourself and scavenge the first round of storage. The bench eats the biggest chunk. Four sheets of decent plywood, a bag of screws, and two afternoons of cutting and assembly will land you something solid for around three hundred. Add a used rolling tool chest from a garage sale or Facebook Marketplace for another hundred to two hundred, and you have a place for almost every hand tool.
Lighting is where weekend timelines slip. A single overloaded circuit and a trip to the hardware store for wire or breakers turns Saturday into two Saturdays. Budget an extra fifty for materials you did not plan on, because basements always hide something behind the walls. Dust collection can wait at first. A shop vac with a HEPA bag and a homemade separator bucket gets you cutting for under a hundred and fifty. The real collector comes later, after you know which machines stay and which ones collect dust themselves.
Recommended Products


Sili Flex Fit Fittings: Stretchable silicone ends easily adapt to different dust ports—no more searching for the perfect fitting.

Powerful 7.4-amp induction motor combined with the 9-inch impeller moves up to 600 cubic feet of air per minute
Common Mistakes in Basement Shops

The first basement shop I set up had one window and a twenty-year-old furnace sharing the same air. Sawdust settled on every flat surface within two hours, and the shop light I clamped to a joist left my workbench in shadow while it lit up the water heater like a stage. That light cost me a finger-width of tearout on a walnut board because I could not see the grain direction change until the plane hit it.
Running a shop vacuum off the same circuit as a fifteen-amp table saw taught me the rest. The breaker tripped mid-rip, the board kicked, and the afternoon went to fixing the edge instead of finishing the cut. A dedicated line would have cost maybe two hundred dollars in materials; the ruined oak cost half that, and the time cost the whole weekend.
Most beginners, myself included, treat ventilation as an afterthought because the basement feels sealed and safe. Moisture builds behind the machines, rust forms on cast iron within a season, and the air you breathe never fully clears. Two years in, I moved the compressor outside the wall and cut an actual return. The difference was immediate enough that I wished I had done it on day one, before the first tool rusted.
Recommended Products

4-Outlet Power Strip:This garage shelf wall mount features an integrated 4-outlet power strip with a 6.5-foot cord for easy charging. Charge your tools directly on the shelf without the hassle of searching for outlets. By combining storage and functionality, this tool rack saves space while ensuring your power tools are always ready for use.

Wall Control metal pegboard is more than 10 times stronger than conventional pegboard

Value Package: Our pegboard tool organizer comes with 278pcs pegboard accessories, 16 different type pegboard hooks including 12pcs peg board bins, curved hooks, angled hooks, straight hooks, and ring tool holder, multi tool rack. 109pcs of them are peg locks for fixing hooks
Frequently Asked Questions
What are some good workbench ideas for a basement woodworking shop?
A fold-down wall-mounted bench saves floor space in tight basements and locks at standard height when in use, while a stationary bench built from two-by lumber and a solid-core door gives you mass that will not shift during hand-planing. Adjustable height peg holes drilled every two inches through the legs let you reposition the top for different tasks without the cost of a crank mechanism. For a first shop, a basic fixed bench with a replaceable hardboard surface lets you learn what you actually need before committing permanent floor space.
How should I organize my tools in a basement woodworking shop?
Wall-mounted racks and pegboards behind the bench keep tools visible and within reach without eating floor space, with sharp edges like chisels and planes placed where you can see them. Shelving runs high on end walls for less frequently used items like cutoff bins and finishing supplies, while a narrow rolling cart slides under the bench for shellac mixing and hardware layout. Start with open storage and add cabinets only for items that rust or spill, since every closed door adds a step between you and the tool.
What type of lighting is best for a woodworking shop?
Overhead shop lights on a separate switch, spaced so beams overlap, give you a baseline bright enough to move safely, while task lighting like a gooseneck lamp bolted to the bench back rail puts raking light across layout lines where shadows hide miscuts. Three zones with three separate switches, bench, miter station, and assembly table, let you light only where you stand. A color temperature around 4000K reads wood true; warmer turns maple yellow and cooler makes every board look like hospital linoleum.
How can I manage dust in my woodworking shop?
A dedicated dust collector with a cyclone separator handles the volume that a standard shop vacuum chokes on within minutes, while a compact shop vac with hose adapters captures dust at the source for quick cleanup between cuts. In a basement with no natural air exchange, a ceiling-mounted air filtration unit cycling the room volume every ten minutes catches what the collector misses. Layering both systems matters because airborne dust lingers hours after the tool stops in an enclosed underground space.
What should I consider for power supply in my woodworking shop?
Plan for more outlets than you think you need, spaced every six to eight feet along every wall, with a dedicated 20-amp circuit for major tools so the lights do not die mid-cut and a separate 240-volt line for larger equipment down the road. A subpanel in the shop itself saves trips upstairs to reset breakers and lets you add circuits later without tearing into finished walls. Power strips and extension cords create trip hazards, reduce voltage to tools, and often violate code; if the basement has old fuse box or knob-and-tube wiring, bring in an electrician before moving machines in.