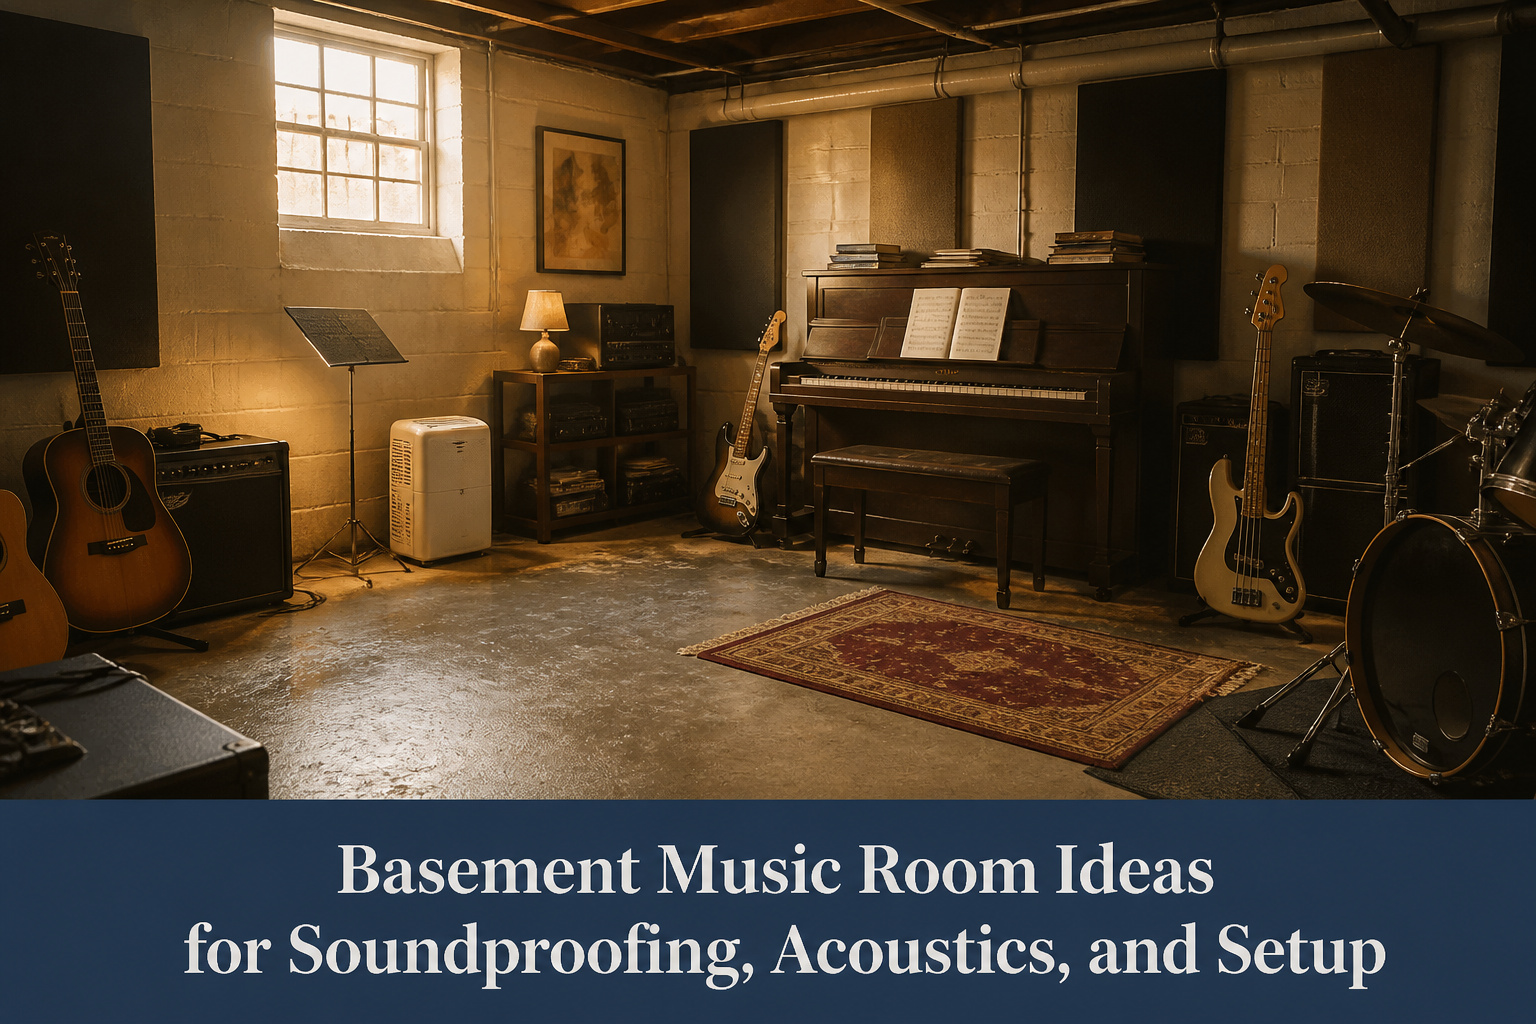
A basement music room is a practice and recording space carved out of the lowest floor of a house, where concrete walls and underground placement create acoustic problems that upstairs rooms do not face. The catch is that moisture kills gear faster than bad sound ever will, so a dehumidifier running near your instruments matters more than the first panel you hang. I learned that after watching carpet wick water up through concrete for two years, warping cabinets I had already treated with $800 in foam.
Soundproofing the Space

Soundproofing a basement music room starts with the gaps where noise actually slips through. Before I spent a dollar on foam or panels, I hung heavy curtains over the single window and the door leading to the stairs. That alone cut the bleed to the rest of the house by half. From there, acoustic panels on the back wall and bass traps in the corners tamed the room’s natural boom without touching the structure.
Basic soundproofing runs $500–$1,000 for foam, panels, and those dense curtains. If you are renting or testing whether the space will stick as your practice room, that is where I would stop.
The jump to advanced work gets expensive fast. Floating floors and resilient channels decouple the room from the house frame, but the materials and labor push the range to $2,000–$5,000. I have never done this myself, and the sources I trust suggest it only makes sense if you are recording at volume or have thin walls shared with sleeping kids.
Professional isolation, the kind that turns a basement into a studio proper, lands at $5,000–$15,000. At that point you are paying for complete construction: sealed doors, HVAC silencers, the full envelope. Hire a contractor if your neighbors complain or if you are tracking drums after 9 p.m. For a weekend guitarist working a few hours on Sunday, the money is better spent on better monitors and the basic treatment first.
Recommended Products
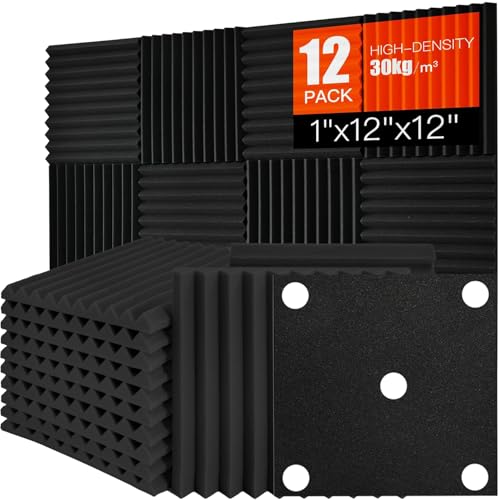
Professional Sound Absorption for Studios and Podcast Spaces - High-density acoustic foam panels and sound absorbing panels are designed to manage reflections and reduce echo in studios, podcast rooms, vocal booths, and YouTube content creation spaces, delivering clearer and more controlled audio without structural soundproofing.

High-Quality Wall Panels: Our acoustic panel set is crafted with high-density polyester fiber, premium medium-density fiberboard, and a solid wood veneer. This combination provides an elegant look, superior sound damping, and excellent sound deadening, significantly improving room acoustics
Moisture Control

Basements pull moisture from the surrounding earth even when walls look dry, and music equipment dies faster from damp than from almost anything else. A portable dehumidifier running near the gear keeps relative humidity low enough that mold stops being a threat and metal parts stop corroding. Empty the reservoir weekly, or run a hose to a floor drain if the room is out of sight enough that you will forget.
Waterproofing matters more down here than soundproofing ever will. Check the walls during the next heavy rain for any darkening or seepage, and fix the source before hanging a single panel. I have seen people build entire studios on carpet over concrete that wicked up moisture for years, warping cabinets and ruining cables they never bothered to trace back to the real cause. A dry basement with mediocre acoustics beats a wet one with perfect treatment every time.
Lighting for Long Sessions

Natural light in a basement music room is usually scarce, so daylight-mimicking LED lights become the replacement you actually need. Musicians reading sheet music or squinting at mixer controls for hours will notice the difference fast. Harsh spots and shadows tire the eyes, and uneven illumination makes it harder to catch details on a page or a screen. Daylight-mimicking LEDs spread light evenly across the workspace, reducing that strain and keeping sessions comfortable longer. When planning the electrical layout, enough outlets matter for powering equipment safely, but the quality of the light itself determines whether you can stay down there past the first hour without feeling it. Even lighting is not a luxury in this setup. It is what lets the work happen.
Recommended Products

CURTAIN DETAILS: The room divider curtain's fabric is super soft, thickness and heavy innovative triple-weave polyester fabric. The 14 silver grommets top (inner diameter is 1.6-inch) adds a modern touch and easy hanging. ONLY CURTAIN INCLUDE.
Flooring That Absorbs Sound

Carpet and rubber mats do the heavy lifting for both sound and body. A dense pad under a low-pile carpet knocks down the slap of a bass drum or the scrape of a kick pedal, and the same give keeps ankles from stiffening during two-hour standing sessions. I learned that distinction the hard way after putting down thin foam tiles that deadened high frequencies but left every footfall jarring up through my knees.
Rubber mats run thicker and denser, which suits drum kits and amps that vibrate against the concrete. The tradeoff is surface feel; rubber grips better than carpet when shoes are off, but it is cold in winter and shows dust. A 3/8-inch rubber mat over a carpet pad splits the difference, keeping the floor absorptive without turning the room into a gym.
Concrete basements push sound straight back up, so whatever sits on top needs mass as much as softness. Wall treatments handle the reflection above knee height; the floor handles what bounces low and what your body takes in through your feet. skimp on one and you will feel it in the mix and in your calves the next morning.
Recommended Products

Semiconductor dehumidifiers use thermoelectric cooling to remove moisture from the air. They create a drier, more comfortable environment by reducing humidity and improving air quality.
Wall Treatments for Better Acoustics

Bare concrete walls in a basement music room do more harm than most people realize. Sound bounces hard off flat, parallel surfaces, creating flutter echo and muddying everything from a clean guitar tone to a vocal take. Acoustic panels, bass traps, and diffusers are the three pieces that fix this, and each one handles a different problem.
Acoustic panels absorb mid and high frequencies. Mount them at reflection points, the spots where sound ricochets directly from the speaker or instrument to your ear. A basic treatment with standard fabric-wrapped panels runs $500 to $1,500 for a typical basement space, enough to tame the worst slap-back and make the room usable for tracking and mixing. Moving up to enhanced treatment with thicker panels and broader coverage pushes the range to $1,000 to $3,000, which is where I would start if the room doubles as a serious listening space.
Bass traps sit in corners where low frequencies pool and build up, making kick drums boom and bass guitars disappear into mud. Diffusers scatter what energy remains, keeping the room from sounding dead. High-end treatment that layers all three elements across the full room runs $3,000 to $10,000, overkill for a weekend player’s setup but justified for someone recording other people.
The trap is buying too many panels and skipping the corners. Corners matter first. Treat them, then cover the first reflection points, and the room changes immediately.
Recommended Products

Mass-loaded vinyl Sound barrier walls, floors, and ceilings improve sound quality, creating a serene environment, providing instant mass with sound barrier insulation to any...
Ergonomic Furniture

A basement music room sinks or swims on how long your body lasts down there. My first attempt was a folding chair and a milk crate for my interface. Two hours in, my back reminded me why studios spend money on seating that keeps the spine neutral past the first set.
For budgets landing in that intermediate $500–$2,000 furniture range, a proper task chair with adjustable armrests runs about $200–$600 and pays for itself in sessions that stretch past dinner. Height matters more than padding. Your forearms should level with your keys or mixing surface without hiking your shoulders.
Standing work deserves equal thought. A height-adjustable desk or a simple riser for your keyboard, in the same $200–$500 bracket, lets you shift posture between tracking and editing. Guitarists writing at a desk need clearance for the instrument body; a 30-inch minimum depth keeps the headstock from knocking monitors.
The professional setups push custom desks to $2,000–$5,000, but the principle stays identical: the tool should fit the body, not train it into a shape that hurts. My own limit is simple. If I notice the furniture, it has already failed.
Storage That Keeps Gear Ready

Basement air sits heavier than upstairs air, and that matters for anything with strings or electronics. I learned to look for closed storage with some kind of seal, not open racks that let the damp cycle straight through every season change.
A cabinet with a solid door and a small dehumidifier inside costs less than replacing one warped guitar neck. Shelves work if you have the wall space and can place them well above the concrete floor, but I would still put cases on those shelves rather than leave instruments exposed. The cases themselves become part of the humidity buffer.
For amplifiers and mixers, a rolling cart or cabinet on casters keeps everything reachable during a session and movable when the water heater leaks or you need to run cables differently. Label the drawers. After enough late nights, you will stop trusting yourself to remember which drawer holds the DI boxes.
Decor That Feels Like Yours

A basement music room can feel finished acoustically and still look like a rental unit someone else designed. Posters and artwork fix that fast, and the choice matters more than people admit. A framed concert photo from a show you actually attended hangs differently than a mass-printed guitar poster. The memory is part of what pulls you downstairs on a Tuesday evening when practicing feels like work.
Artwork should leave wall space for the sound to breathe. Heavy frames clustered behind the drum kit or amp stack create odd reflections that cheap foam panels struggle to fix. Thin canvas prints or tapestries mounted with a gap to the wall work better, and they travel when you move.
Color sets mood more than subject. Deep reds and warm ambers read as intimate under basement lighting; cool blues and stark whites feel like a practice space you rent by the hour. Paint one accent wall, then hang pieces that pick up that tone rather than fighting it. The room starts feeling like yours when the eye lands on something personal before it notices the exposed joists or the sump pump corner you could not hide.
Electrical Planning

The basement outlet count that looked generous when the space was empty shrinks fast once amps, pedals, and recording interfaces start claiming their spots. Plan for at least double what you think you need, ideally on dedicated circuits that keep lighting separate from audio gear so a dimmer flicker doesn’t bleed into a take.
Extension cords snake across concrete faster than you’d expect, and they are a lousy long-term plan. Every junction is resistance, every daisy chain is a fire inspector’s headache, and the trip hazard stops being funny the first time you yank a power brick mid-session. If the panel is close enough, an electrician can add circuits for less than the cost of replacing one fried preamp. If it is not, a heavy-gauge power conditioner with enough outlets for the whole rack buys you time and protects the investment.
Recommended Products
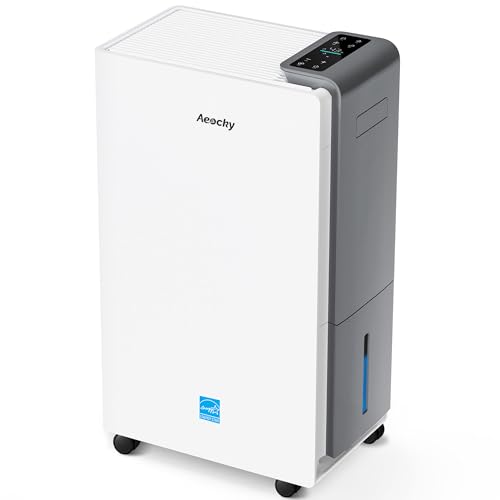
【ENERGY STAR 25 ≠ ENERGY STAR Most Efficient 2025】Don't fall for competitors' word games. With only 2.6% of ENERGY STAR models earning "Most Efficient 2025" title, these options are exceptionally rare on the market. RHEA-001 is one of the few to truly hold this top-tier certification. Many brands use misleading phrases like "Energy Star Efficient 25" or "Energy Star 25" to imply a standard they haven't met. Choosing them is a risk.With AEOCKY, you get verified performance and the peace of mind of authentic, top-tier efficiency.
Seating You Can Settle Into

A folding chair from the garage will keep a guitarist upright for about twenty minutes before the shoulders start to tighten and the playing turns sloppy. For sessions that stretch past an hour, the seat matters as much as the instrument.
The right chair keeps the spine aligned without locking the body upright. A slight recline, about 100 to 110 degrees, lets the ribcage expand fully for wind players and prevents the lower-back pinch that comes from a straight-backed dining chair. Armrests are the first thing to drop; they fight the elbow room a violinist or drummer needs. A padded, waterfall-edge seat avoids the pressure point behind the knees that cuts off circulation during long takes.
Height adjustability lands differently here than at a mixing desk. The musician needs feet flat on the floor for proper technique, so the chair goes up or down to meet the instrument, not the other way around. A piano bench works only because it is paired with a fixed-height keyboard; for almost everything else, a stool with a threaded post or a simple gas lift gives the few inches of range that make the difference between playing through a track and stopping to stretch.
The basement’s cool air means fabric or mesh beats vinyl or leather, which stiffens and creaks against clothing. A chair that swivels seems useful until it drifts mid-phrase; locking casters or a fixed base keep the body aimed at the mic or the music stand without constant correction.
What This Costs at Three Budgets

A basement music room can land almost anywhere between weekend-project territory and full renovation territory. The passages break it into three realistic stops.
| Basic ($2,000–$5,000) | Intermediate ($5,000–$15,000) | Professional ($15,000–$50,000+) | |
|---|---|---|---|
| Acoustic treatment | Entry-level panels | $1,000–$3,000 for enhanced panels and diffusion | $3,000–$10,000 custom-designed with professional install |
| Soundproofing | Minimal (sealing gaps, basic insulation) | $2,000–$5,000 for pro-grade insulation, soundproof doors, double-glazed windows | $5,000–$15,000 complete isolation, floating floors, resilient channels |
| Equipment | Used or entry-level gear | $2,000–$5,000 mid-range mics, interfaces, monitors | $5,000–$20,000 top-tier mics, preamps, interfaces, monitors |
| Furniture/decor | What you already own | $500–$2,000 ergonomic pieces, storage, aesthetic upgrades | $2,000–$5,000 custom desks, high-quality seating, advanced storage |
| Miscellaneous | n/a | n/a | $1,000–$5,000 HVAC adjustments, electrical work, contingencies |
Permits and inspections sit outside these totals. What triggers them varies by municipality: electrical work beyond swapping a fixture, structural changes, or dedicated HVAC lines often need sign-off. Budget an extra 10–20% and a few weeks of scheduling if your plan touches any of those.
For most first-home owners, the intermediate tier hits the sweet spot. The acoustic treatment is real enough to record without embarrassing reverb, the soundproofing keeps family life tolerable, and the gear upgrade path is clear. The professional tier only makes sense if you’re tracking drums or running commercial sessions; otherwise you’re paying for isolation you’ll never stress-test.
When to Call a Pro

A consultant maps where sound actually travels instead of where you assume it does. YouTube taught me to slap panels on the wall behind my monitors; what I missed was the flutter echo bouncing off the concrete ceiling and the bass buildup in the back corner. That $500–$1,500 budget for acoustic panels can disappear fast on guesswork.
At the $2,000–$5,000 total project tier, paying someone a few hundred dollars to model your room starts making sense. They bring measurement microphones and software that shows frequency response problems your ear cannot reliably detect, then specify exactly where panels, bass traps, and diffusers go rather than selling you a generic kit. The basic $500–$1,000 soundproofing range, foam and heavy curtains included, is where DIY still wins; that is simple material stacking, not physics.
The call happens when your mixes translate poorly, headphones sound nothing like your room, or household complaints persist after you have hung everything the tutorials suggested. A consultant will also catch what products cannot fix: HVAC rumble through ductwork, or a door that leaks more sound than the walls around it.
Making the Space Inspire You

The wall my bass leans against now used to hold a folding table stacked with boxes. Moving those out and letting the instrument stand where I see it changed whether I played at all. Instruments stored in cases stay in cases. A guitar on a wall hanger or a keyboard on a stand you pass on the way to the laundry invites the fifteen-minute session that keeps skill from rusting.
Layout follows the same logic. I set up so the first thing from the stairs is the playing area, not a storage corner. The creative ritual starts with walking in and picking something up, not clearing space. For small basements, that usually means one zone against the outer wall with gear visible, another behind you for amps and cables. Sight lines matter more than square footage. My drum machine lived in a drawer for months; on a shelf at eye level, it gets used weekly.
Renters should skip ceiling-mounted hardware for heavy instruments. A leaned guitar can slide, but wall repair from a fallen mount costs more than a sturdy floor stand. The stand itself becomes part of the room’s rhythm, a fixed point you move around.
What I Got Wrong the First Time

The acoustic panels went up first, before I had measured where the actual reflection points sat. Bass traps landed in corners that looked right, not where the low-end buildup actually collected. Two weeks of mixing later, everything translated poorly to headphones and car speakers. Pulling it all down and repositioning with a mirror and a friend walking the walls cost a Saturday, but the real hit was the extra $340 in adhesive and mounting hardware when the original strips failed on repositioning. The panels themselves survived, barely. A basic setup runs $500–$1,500 for treatment, and I had blown nearly a quarter of that on do-overs before a note was recorded. Now I mark everything in painter’s tape first, live with the placement for a week, and only then commit.
Frequently Asked Questions
How much does it cost to build a basement music studio?
A basic basement music room runs $2,000–$5,000, an intermediate setup lands at $5,000–$15,000, and professional builds start around $15,000 and can exceed $50,000. The article breaks this into three tiers: basic gets you entry-level treatment and used gear, intermediate adds enhanced acoustics and mid-range equipment, and professional includes complete isolation and top-tier recording gear. Most first-home owners find the intermediate tier hits the sweet spot.
How do I soundproof my basement studio?
Start free by sealing gaps with heavy curtains over windows and doors, which alone can cut noise bleed by half. From there, acoustic panels and bass traps tame room boom for $500–$1,000. Advanced methods like floating floors and resilient channels jump to $2,000–$5,000, while full professional isolation with sealed doors and HVAC silencers runs $5,000–$15,000. For renters or weekend players, the basic approach is where to stop.
What kind of lighting is best for a music studio?
Daylight-mimicking LED lights work best because they spread evenly across the workspace and reduce eye strain during long sessions. Natural light is usually scarce in basements, so these LEDs replace what you are missing. Harsh spots and uneven illumination tire the eyes and make it harder to read sheet music or see mixer controls clearly. Good lighting is what lets you stay down there past the first hour without feeling it.