
Shoji sliding doors are Japanese-style interior panels built from thin wooden frames, translucent paper, and a lattice grid called kumiko. Installing them yourself is straightforward until you reach the overhead track; that board must hang perfectly level, because every door below it depends on that single shimmed surface. The Johnson Hardware system I used requires a minimum door thickness of 1 3/8 inches and carries 200 pounds per roller, but the real margin for error is in the opening you measure at three points across and three down, taking only the smallest numbers as your hard dimensions.
1. Design the Doors

A scale drawing saves the mistake of building doors that look right in your head but fight the opening once they arrive. I start every shoji project by sketching the full front view: the width, the height, and the track placement at top. The drawing doesn’t need to be architectural; graph paper at quarter-inch scale is enough to catch a rail that lands awkwardly or a panel that throws off the balance.
The Golden Ratio gives the bottom panel its height: divide the known width of your door by 1.618. For a 36-inch-wide panel, that lands you around 22¼ inches, a proportion that breaks up the tall expanse without looking like an afterthought. An online calculator handles the math if you don’t trust your pencil. The ratio isn’t sacred; it just happens to work here, adding weight low where feet and vacuum cleaners live.
Measure the opening at three points across the width and three down the height. The smallest width and the smallest height are your hard numbers; everything else gets shimmed later. For the valance that hides the tracks, plan a board wider than your two tracks combined, screwed level into ceiling joists above the opening.
The trick is to get that thick board as level as possible, which requires an accurate level and probably some shimming.
That shimmed board is what everything else hangs from, so spend the time here. With the opening mapped and the panel height set, count your panels: two doors for a single opening, four if you’re covering a wider space with pairs that meet in the middle. Draw each stile overlapping its mate at center so the gap stays hidden from either side.
Recommended Products

🛠Overlap Space: For Bypass Barn Door Hardware kit, there would be a 6.7" overlap space since the 2 doors are hanging on one single rail. Please be reminded that your door panels should be wider than your opening. If not, the 2 rollers will hit when one door slide, then drive other door slide.

DOOR BOTTOM GUIDE – This sliding door floor guide helps keep by-passing sliding door panels centered on their respective tracks
2. Select Materials

Wood choice for shoji doors comes down to how much weight the track hardware can handle and how much grain you want showing through the paper. Quartersawn fir sits in the middle on both counts: straight grain that stays subtle, enough heft to feel solid, and a price that does not require importing from Japan. Western red cedar and Alaskan yellow cedar weigh less, which matters when you are hanging four panels from an overhead rail, but the grain is looser and more aromatic than traditional sugi. The fir also lets you use a plywood panel at the bottom for stiffness without throwing off the proportions.
For the paper, laminated shoji paper at 0.45 mm thick carries real handmade washi inside a thin plastic skin. It wipes clean, shrugs off a broom handle or a cat’s claws, and trims with a sharp knife after you tape it in place. Handmade washi alone looks warmer and transmits light more softly, yet it tears and stains and costs more to replace. The laminated sheet wins for doors that see daily use; the raw paper belongs to rooms where the panels stay open most of the time.
| Material | Weight | Grain | Best For |
|---|---|---|---|
| Quartersawn fir | Medium | Tight, straight | Balanced cost and durability |
| Alaskan yellow cedar | Light | Moderate | Reducing track load |
| Western red cedar | Light | Open, aromatic | Budget builds, softer look |
| Laminated shoji paper (0.45 mm) | n/a | n/a | High-traffic, two-sided grids |
| Handmade washi | n/a | n/a | Display rooms, diffused light |
Recommended Products

【6FT Room Divider Wall, Brings You Larger Personal Space】104" width for maximum coverage, 6ft tall by 17.3" wide each panel. Our 6-panel room dividers provide more privacy, make your life freer and much more relaxed. Jostyle room divider combines practicality and aesthetics, the simple lattice design make it can be used as a stylish addition to your home or office.

Rice Paper and Spruce Wood: Our folding screen features fiber-reinforced rice paper that provides privacy without blocking light. The durable Scandanavian Spruce frame ensures long-lasting performance and is light enough to move and store easily.

Lightweight & Installation-free:The partition room dividers can be used when unfolded, with two-way metal hinges at the panel links
3. Cut and Prepare Wood

Straight grain matters more for shoji than for most furniture because every rail and stile stays visible. I look for CVG fir: clear, vertical grain with tight lines running the full length of the board. Quartersawn stock like this stays flat and reads as stable geometry behind the paper. Softwoods with wild grain will telegraph every seasonal shift right through the rice paper.
Rough lumber gets milled in two stages. First, rip and plane to thickness oversize, leaving everything long for final trimming. Stiles for a standard door end up at 30 mm thick, with double tenons cut to 6 mm each. The double-tenon layout is worth the extra marking: set one gauge to 6 mm, another to 12 mm, and work off both faces so the mortises mirror perfectly. That symmetry means you can flip the piece and reuse the same settings rather than fussing with fresh measurements.
Stickering the boards for a couple weeks before final milling lets them settle to your shop’s humidity. Skip this and the joinery you cut tight on Saturday opens up by March.
Recommended Products

[Stylish Interior Shoji Paper] Colored Japanese shoji paper that adds a modern, stylish touch to your space. Suitable for various shoji applications including shoji screens, sliding doors, blinds, dividers, panels, and windows. Easy to apply with shoji glue—feel free to combine different colors for a personalized design.

Package Dimensions : 27.94 H x 5.33 L x 5.59 W (centimeters)

Colored Vellum Paper: Cridoz transparent paper comes with 45 sheets colored vellum of 9 vivid color, including, pearl gold, pearl silver, pearl beige, dark blue, scarlet, orange, light blue, light green and light pink, each color has 5 sheets evenly. Great for making wedding invitations, party invitations card insert tissue, table numbers cards, photo overlays, scrapbooking and much more
4. Joinery

Mortise and tenon joints carry the frame, while half-lap joints hold the kumiko lattice together. The frame joints need to be tight enough that a test clamping leaves no visible gap, but not so tight that the thin tenon cheeks split when you drive them home. I cut the mortises in the stiles first, then pare the tenon shoulders to fit, chamfering the ends so they slide past the entry without catching.
The kumiko itself measures 10 mm thick by 18 mm deep, which is thin enough that grain orientation matters more than usual. Clear vertical grain keeps the pieces from snapping when you tap the half-laps together. Cutting the half-laps slightly tight, about 0.5 mm over, leaves room to plane for a clean face after the joint is already sized. Plane before cutting and the inconsistencies stack; cut before planing and you risk exposing gaps if you need more than three or four passes to clean up tricky grain.
For the interior frame that holds the lattice, called the tsukeko, mitered mortise and tenon joints at the corners keep the profile slim while still locking the grid firmly in place.
Recommended Products

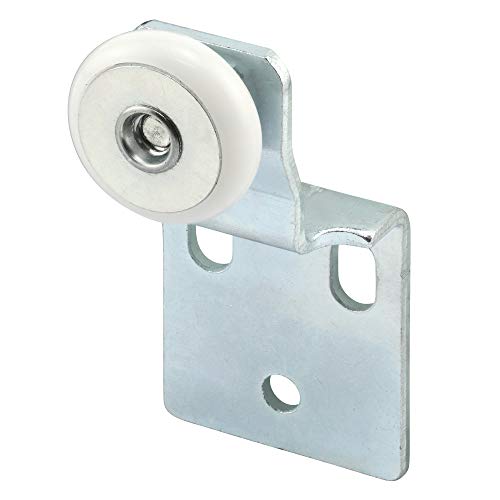
Used by a variety of by-pass door manufacturers

Roller assemblies for use with top hung, by-passing sliding wardrobe doors
5. Assemble the Grid

Kumiko strips need to run clear and straight-grained, or they split when you push them into mortises. I label one end of every piece before anything gets cut, keeping the grain running the same direction across the whole grid so the finished lattice reads as one quiet pattern instead of a mess of competing angles.
Cut each kumiko to length so the fit is snug but not forced. An overly tight joint bows the assembly; a loose one rattles and shows gaps through the paper. Test the center section dry in the actual door opening before any glue touches the wood. There should be a hair of wiggle room, barely perceptible. Once the fit checks out, spread glue thin with a stick inside each half-lap, press the pieces flush against your work surface, and let friction hold them. Clamps are not necessary for the center grid.
The outside pieces have only end rabbets, not laps, so they go on one at a time. Push them tight and clamp them to the edge of a flat sheet for support. You can attach two opposing sides together this way.
Rice glue is what you will reach for later when the paper goes on. It dries clear and does not telegraph through, but only if you control squeeze-out now. Any glue that escapes the lattice joints and skins over will leave hard spots that read as shadows once the shoji paper is stretched across. Wipe the frame clean before it sets.
Recommended Products
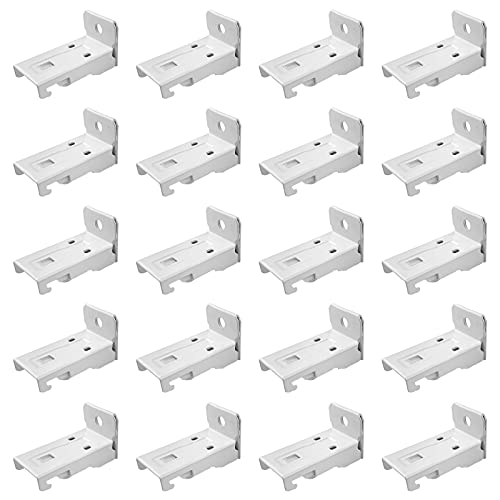
Suitable for tracks with a width between 8.5mm-11mm,not available for KXLife 2nd Generation curtain track.

The stand is made of high quality iron and plastic for durability.
6. Apply Paper

Laminated shoji paper at 0.45 mm thick hits a practical sweet spot I didn’t expect until I read through the options: traditional washi paper inside thin plastic that wipes clean and survives a cat or a falling broom, yet still trims cleanly with a sharp knife. That last part changes the whole technique. Instead of pre-cutting the paper to exact size, you tape it to the finished grid and slice off the excess after.
The specialized tape matters here. Nitto tape at 5 mm wide hides behind 1/4-inch-thick muntins and grips both the laminated paper and the wood. Pull the tape backer at just one end first, stick down that end of the paper so nothing overhangs, then remove the rest of the backer and roll steadily toward the other side. Finish by rubbing firmly over every grid piece that carries tape.
A flat-sided marking knife trimmed my edges flush, the flat side hugging the grid. Hone it to 8000 grit to get through the plastic, work in short sections, and start with a light pass to establish the cut line. Hold the blade at a high angle to keep it tracking straight. Skip tape on a few internal grid pieces; the outside edges carry enough of the load.
Recommended Products
🛠Overlap Space: For Bypass Barn Door Hardware kit, there would be a 6.7" overlap space since the 2 doors are hanging on one single rail. Please be reminded that your door panels should be wider than your opening. If not, the 2 rollers will hit when one door slide, then drive other door slide.

SLIDING DOOR HARDWARE KIT: Complete 48-inch bypass door hardware set accommodates closet doors from 3/4 to 1-3/8 inch thickness, featuring galvanized steel construction with WeatherGuard protection for long-lasting durability.

Door roller kit:You will receive 1 set of cabinet door roller kit, including 2 front door rollers, 2 rear rollers, 1 slide track, and 6 screws, providing comprehensive accessories for easy installation or replacement of old cabinet door rollers.
7. Install Hardware

Johnson Hardware tracks need a minimum door thickness of 1 3/8 inches, and the rollers attach to the top edge with long, coarse screws that are load-tested well beyond the stated 200 lb rating per door. I was skeptical about hanging thick doors from four screws, but the company assured me on this point, and the system holds without drama. The hardware includes 1/4 inch of vertical adjustment at each roller position, which matters more than I expected; my walls were not square, and being able to tweak each corner independently saved the alignment.
Mount the overhead track to the upper edge of the door opening with the rollers already inside, then attach the mating hardware to the top edge of each door and lift them into place. Three guide tabs at floor level, centered where the doors overlap, keep them from swinging fore and aft. The hardwood flows uninterrupted underneath, which is the main reason I chose this suspension style over captured grooves. Adjustment for smooth travel is straightforward once the doors hang; the soft-close option is available, though standard slides suited my plan to edge the doors with rare-earth magnets instead.
Recommended Products

Elegant Design – Features a plum blossom print on light-filtering rice paper panels that adds a touch of artistry and serenity to any room.

Japanese Minimalism: VEVOR room divider elevates your space, and this 95-inch Japanese-style screen is designed with three elegant panels that offer ample privacy. It provides generous privacy, allowing you to enjoy life more freely. The symmetrical grid design combined with an ink painting-style screen creates a stunning balance of function and decor, adding a touch of traditional Asian artistry to your home.
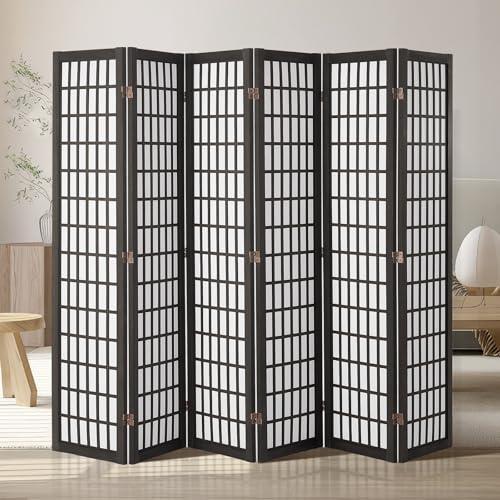
Japanese Minimalism: Our room divider elevates your space, and this 95-inch Japanese-style screen is designed with three elegant panels that offer ample privacy. Its sleek wooden symmetrical grid is the ideal blend of functionality and style, bringing a touch of classic Japanese charm to your home while allowing you to live comfortably.
8. Finishing Touches

Sand the bare wood to 220 grit before the first coat goes on. The surface needs to be smooth enough that a brown paper bag, rubbed between coats, picks up the last fibers without gouging. Two coats of wipe-on oil is what I would plan for: the first sinks in and seals, the second builds the depth that makes fir look like it has aged a season in a single weekend. The paper-bag step matters more than it sounds. Skip it and the second coat drags, leaving streaks that show at an angle.
Oil leaves the natural look that reads as traditionally Japanese, but it is not the only honest path. A hand-planed surface on a tight-grained softwood such as Alaskan yellow cedar or Douglas-fir can stand bare, polished by the blade itself. That finish repels water and wipes clean without reapplication. The catch is the tooling: a plane sharp enough to take gossamer shavings is a different investment than a sanding block, and the skill behind it takes longer to acquire than a Saturday. For most weekend builds, oil wins on simplicity.
Final hardware adjustments come after the doors have hung for a day. The rollers settle, the frame relaxes into its travel, and the latch plate may need a thirty-second shim. Check the top track for drift: if one door hangs lower, the bottom guide is carrying weight it was not meant to, and the paper will eventually bind. A few turns of the adjustment screw, tested with three slow slides, usually sets it right.
Recommended Products

[The Luminous "Pearl of Papers"] Crafted from premium Gampi bark fiber, our White Rice Paper is celebrated for its natural, pearly sheen. Unlike chemically bleached white paper, this handmade Gampi version offers a sophisticated, semi-transparent glow that adds a high-end, gallery-quality finish to every stroke.
Great Value of Translucent Vellum Paper: Cridoz vellum papers come with 50 sheets vellum. Great for wedding invitations, party invitations card insert tissue, table numbers cards, photo overlays, scrapbooking and much more

[PREMIUM JAPANESE SHOJI PAPER] Crafted in Japan by a specialized shoji paper manufacturer using carefully selected materials. Designed for easy application, this shoji paper adheres well to glue and can be cleanly cut with a utility knife even when wet, ensuring a smooth and beautiful finish.
Tools for This Build

A weekend shoji build lives or dies on whether the right tool is within arm’s reach when you need it. Here is what the work actually calls for, start to finish.
- Table saw or hand saw. A Japanese pull saw with a thin blade and a saw guide handles the precise half-laps for the grid and the tenons on the frame. A table saw speeds the rough cuts if you have one.
- Router with a straight bit, or sharp chisels. The sliding rails need mortises cut clean. A router does this fast; chisels work fine if you keep them honed.
- Hand plane. One source found a new Stanley plane so temperamental he ended up adjusting it with a hammer. Your mileage may vary. The plane still has to flatten and smooth the beams.
- Clamps and a glue brush. Assembly is awkward without enough clamps. Rice glue goes on easier with a dedicated brush.
- Drill bits sized for your track hardware. The upper and lower rails need holes bored to exact depth.
- Measuring and marking tools. A tape measure, a sharp pencil, and a combination square keep the grid square and the doors parallel behind each other when they slide.
That is the core kit. Borrow or buy before you cut the first board; stopping mid-project to hunt a 1/4-inch straight bit kills the weekend timeline.
Recommended Products

Durable Nylon Roller Construction: Features a high-quality nylon roller designed for long-lasting performance and reliable operation

QUALITY MATERIALS :closet door hardware kit are made of high quality nylon, stainless steel and hard plastic, well-made, reliable quality, waterproof and moisture-proof.

Comprehensive Package: this package comes fully equipped with essential components for instant application; The package includes 4 pieces of dial adjust door hangers in 2 types, 2 pieces for #1 and 2 pieces for #2, together with 8 pieces of screws, making the setup process hassle free and straightforward
Custom Jambs Without Trim

Custom jambs strip away the usual door casing for a wall that meets the door frame like a single plane. The measurement math shifts because the jamb itself becomes the finished edge; you frame the rough opening tighter so the jamb board lands flush with the drywall face, not behind it. Drywall returns to the jamb on both sides, which means your framing has to stay square within an eighth or the shadow line wanders.
For a weekend build on a first install, this detail can eat half a day in shimming and drywall feathering. The payoff shows up in rooms where the shoji doors read as floating panels rather than openings in a wall. In my own reading, the builders who attempted this on their first door set often ended up with gapped corners that trim would have hidden. If the wall is already open or you are pairing the doors with a wider room redo, the cleaner sight line justifies the labor. On a retrofit into finished drywall with paint that almost matches, standard jambs and a thin stop read fine and save the weekend.
Kumiko Patterns

Kumiko patterns turn a plain grid into the part of shoji doors people actually pause at. Traditional designs like yotsu-hishi, the four-pointed diamond, or asa-no-ha, the hemp leaf, each carry meaning and demand different cutting logic. A single repeating motif needs only two or three joint angles mastered; more complex patterns interlock three or four shapes and the tolerances tighten fast. What separates handmade shoji from factory panels is often this lattice alone. Custom patterns let you match a room’s scale, a narrow vertical repeat for low ceilings or a wide horizontal one to push a wall outward visually. The cutting time roughly doubles with each added joint variation, so a simple asa-no-ha might take an afternoon while a modified pattern with floating elements consumes a weekend. Paper choice matters more here too; dense lattice throws more shadow and heavier paper reads almost solid, while open patterns with thin washi stay luminous. I would not attempt a custom kumiko design on my first build. The visual payoff is real, but the waste from miscuts adds up, and the frame must stay perfectly square or the pattern telegraphs every flaw.
Maintaining Shoji Doors

The paper on shoji doors will need replacing long before the frame gives out. Water spots, tears, and the slow yellowing that comes from years of afternoon sun are the usual reasons. Most people assume the whole door has to come apart, but the paper is only glued along the perimeter and can be peeled off once the edges are soaked. I lay the door flat, run a damp cloth around the frame for ten or fifteen minutes to loosen the old adhesive, and work the paper free with a putty knife. The water should be warm, not hot; hot glue can reactivate and smear across the lattice instead of staying on the frame.
New paper goes on with a thin line of rice glue or PVA applied to the wood, never the paper itself. Smooth from the center outward, trim the excess after it dries, and the grid pattern shows through cleanly. The bottom track is the other place that collects problems. Dust and grit grind into the plastic or brass glide over time, so vacuuming the channel every few months and wiping it with a dry cloth keeps the slide smooth. If the door starts catching, check for a cracked roller before you blame the track; rollers are cheaper to swap than they look.
Frequently Asked Questions
How do I replace the paper on shoji doors?
Remove the door and lay it flat, then run a damp cloth around the frame for ten to fifteen minutes to loosen the old rice glue. Work the paper free with a putty knife; warm water works better than hot, which can reactivate the adhesive and smear it across the lattice. Apply new paper with a thin line of rice glue or PVA on the wood only, smooth from the center outward, and trim the excess after it dries.
What materials are best for making shoji doors?
Quartersawn fir offers the best balance of moderate weight, tight straight grain, and durability for most builds. Alaskan yellow cedar and western red cedar are lighter options that reduce load on the track hardware, though their grain is looser and more aromatic than traditional Japanese sugi. For the paper, laminated shoji paper at 0.45 mm thick withstands daily use and wipes clean, while handmade washi suits display rooms where the panels stay open most of the time.
How do I ensure my shoji doors slide smoothly?
Start with quality overhead hardware rated for the door weight and attach it to a level, well-shimmed board screwed into ceiling joists above the opening. Johnson Hardware systems include 1/4 inch of vertical adjustment at each roller, which lets you tweak each corner independently to compensate for walls that are not perfectly square. After the doors have hung for a day, recheck alignment; if one door hangs lower, the bottom guide carries weight it was not meant to and the paper will eventually bind.