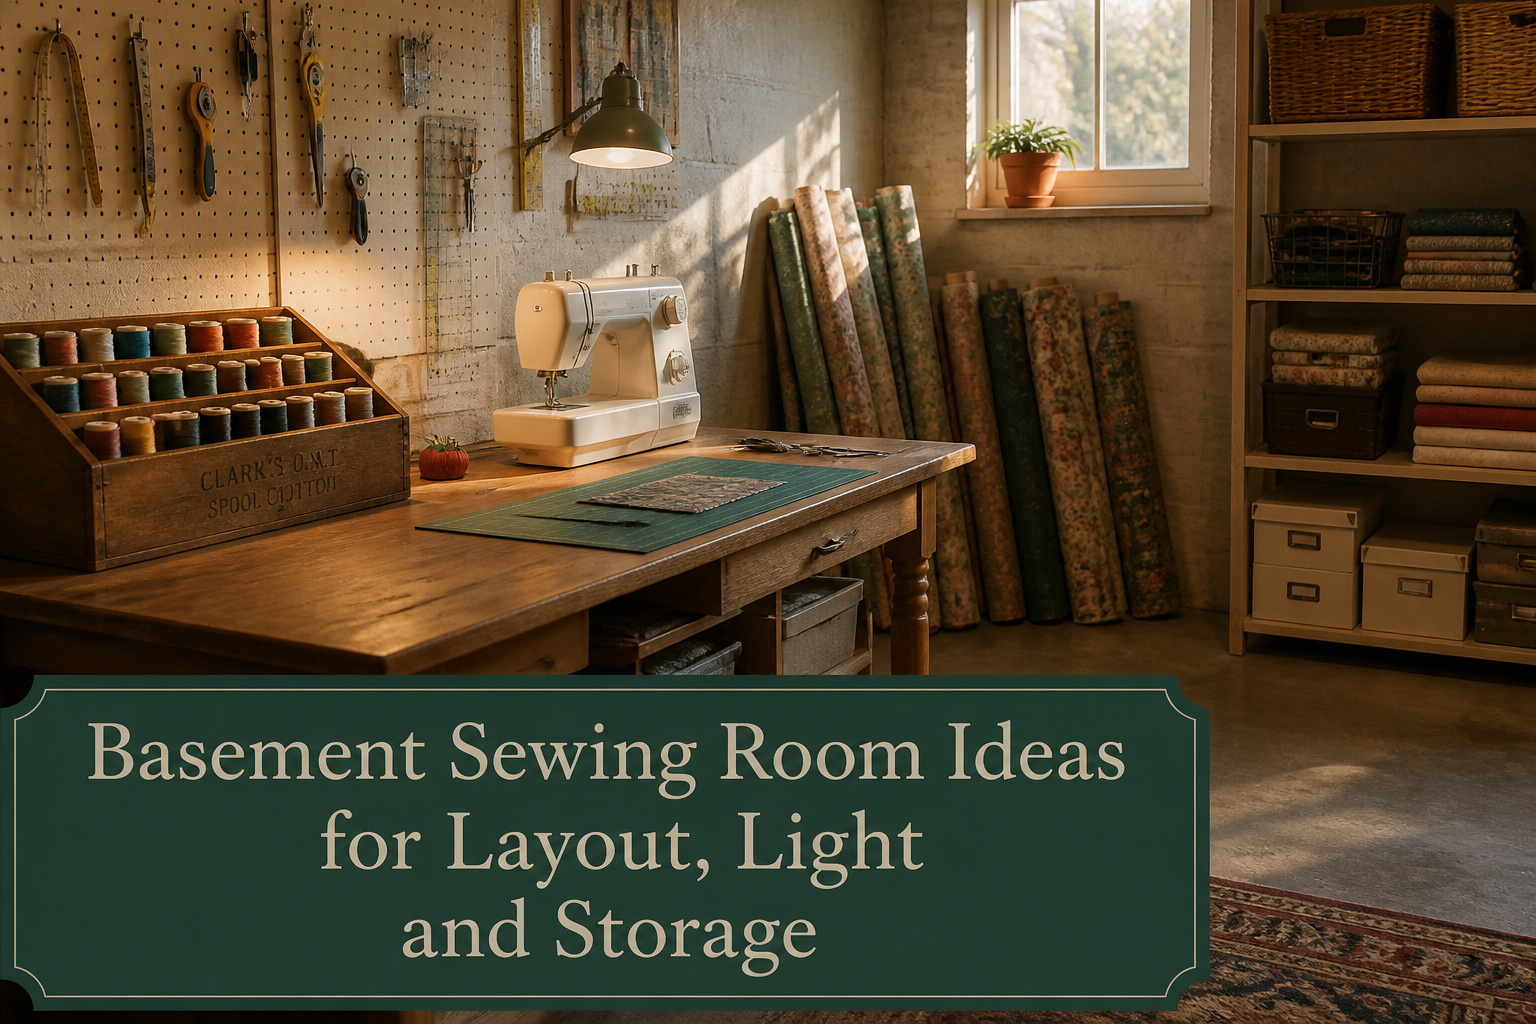
A basement sewing room works at 8×10 feet if the layout is deliberate; anything smaller and you start scheduling your tasks around the furniture. The catch is light: one overhead fixture plus a task lamp from upstairs will turn navy fabric black by November, which is why the first upgrade that pays for itself is daylight-balanced LEDs, not more square footage.
1. Natural Light Solutions

A basement sewing room can feel like a cave without deliberate light, and the size of the space only magnifies the problem. 8×10 feet is the minimum room size that keeps basic sewing setups from feeling cramped, but at that footprint every shadow costs you working surface. I learned this reading through accounts from sewers who misidentified navy fabric as black until they finally added skylights, their least expensive and least intrusive daylight option after talking through windows versus roof cuts with a contractor.
Mirrors and pale paint bounce what light you have, yet they cannot replace the real thing. Layout matters too: placing your machine where it receives the best natural light, then testing that position for a few hours of actual sewing, beats any theoretical plan. If your basement offers no exterior wall for a window, a skylight cuts upward through framing that is already open, and the difference between guessing a thread color and seeing it accurately repays the effort within a single project.
Recommended Products
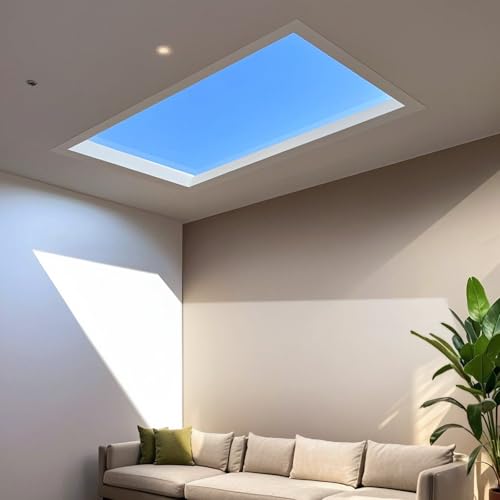
Blue Sky Experience: The artificial skylight ceiling lamp reproduces the ligh of the sun and the sky in just a few centimetres of advanced technology. No matter In your office or at home, library and hospital, you will alway get a peace and relax atmosphere, and experience outdoor sunshine at small space.
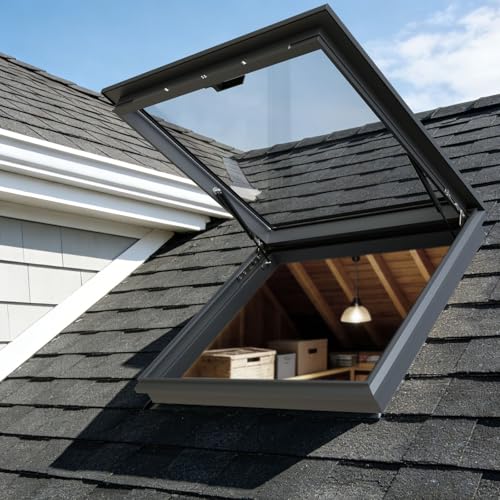
Seamless Welding & Rubber Seals: Creating a physical barrier through seamless welding and combining rubber seals for dual-layer protection, this design blocks small animals, rainwater, and dust, effectively keeping the indoor area dry and avoiding wall mildew

Customizable Skylight Roof Window: Bring abundant natural light into your home with a customizable skylight roof window. for homes with inclined roof skylights or horizontal roof skylights, this sleek and modern skylight improves the aesthetics and en-ergy effici-ency of your space. for sunroom roof skylights, basement skylights, or any room in need of extra sunlight.
2. Furniture Arrangement

A 13-by-20-foot basement studio gives you the luxury of permanent stations, but most of us are working with much less. The minimum that still functions is about 8-by-10 feet, enough for a single machine and a small work surface if you plan the flow right.
The Janome 6500 or any machine with a similar arm length needs roughly 18 inches of clear table behind the needle and open space to the left for fabric to feed without dragging. Cutting tables want a different zone entirely; if they sit at standard counter height, the space underneath becomes dead volume unless you slide storage bins or a folding chair beneath it.
Seating is where multi-purpose pieces earn their keep. A folding cutting mat on a wall-mounted drop-leaf table turns into a pressing station with the iron nearby, then folds flat when you need floor space for layout. I have seen renters use two matching folding tables pushed together for cutting, then separate them for sewing and computer work during the week. The tables store flat against a wall when the basement needs to become something else entirely.
The real limit is not the furniture but the path between stations. In that 8-by-10 minimum, three zones cut, sew, and press in a tight triangle. Anything larger and the triangle stretches; the 13-by-20 studio can run stations in a line with storage backing them, which is faster once you have the room but not necessary to start.
Recommended Products
![Daylight Company Sewing Machine Lamp, Professional Led Light, Fits Most Machines, Bright Led Lamp, Chrome,3.5*2.3*25cm [Energy Class A+]](https://m.media-amazon.com/images/I/21kXDttZReL._SL500_.jpg)
LONG FLEXIBLE ARM - The Daylight Company Professional Sewing Machine Lamp is a compact and efficient lighting solution with a long flexible arm. With dimensions of 3.5x2.3x2.5cm, it saves space while providing ample illumination. The stylish chrome finish adds sophistication to your sewing setup. This energy-efficient lamp falls under the A+ energy class, consuming low power without compromising brightness. It ensures clear and precise lighting for your sewing projects.

FINALLY SEE EVERY STITCH: Built-in machine lights throw a narrow beam from a single spot. Our 12-inch led lights for sewing machine strip spreads clean, daylight-white light across the full area around your needle. 24 bright LEDs at a crisp 6500K color temperature — bright enough to read dark fabric and black thread.

Bright Daylight Lighting Provides clean, bright daylight to improve visibility of fabric, stitches and threads, helping to reduce eye fatigue during long sewing, quilting and crafting projects for a more comfortable working experience.
3. Storage Solutions

Fabric needs a home that keeps it visible but dust-free, and the IKEA Expedit bookcases handle that better than anything custom-built for twice the price. The cubbies fit folded yardage perfectly if you fold against a quilt ruler so every stack is the same width; sort by color and the wall becomes a working palette, not just storage. Small labeled bins in those same cubbies corral ribbons and the small treasures that otherwise migrate across every flat surface.
Tools stay under control with a pegboard mounted on 1×1 boards, painted whatever color makes you want to look at it. Rulers hang there, scissors, the rotary cutter you reach for forty times a session. A drawer bin system works as a home base for supplies not in current use, and a cheap craft tray from Target’s Dollar Spot holds only what tonight’s project needs.
Five to ten minutes at the end of every session keeps the room usable. Scraps go straight into a trash bin kept within arm’s reach. Cords get bundled before you leave. The real discipline is zoning: cutting table, sewing machine, pressing station close enough that you can move between them without resetting the whole room. When each activity has its territory, the mess stays local and cleanup stays possible.
Recommended Products

[Multiple Lighting Choices] - This LED desktop lamp offers 5 lighting modes, each of which can be paired with one of 5 brightness levels, making it suitable for various needs, from bright white light for home office work to soft warm light for bedside reading.

Multiple Lighting Choices. This led desktop lamp offers 5 lighting modes that can each be paired with one of the 5 brightness levels for a total of 25 different light settings.

[Shape-Shifting Light, Fits Any Space]: Unlike rigid single-pivot lamps, this LED desk lamp uses multi-joint arms + 360° gooseneck for multi-angle rotation. It achieves full-axis control (vertical/horizontal/diagonal) via 10+ configurations, solving poor spatial adaptability across scenarios
4. Color Schemes and Decor

Basements swallow color whole, so the paint you choose matters more than it would upstairs. I learned this watching a friend repaint her sewing space twice after the first gray read as concrete. She landed on Mindful Gray for the walls, a warm tone that keeps a low-ceiling room from feeling like a bunker without fighting the lack of natural light.
For furniture, bolder color pays off. An old entertainment cabinet painted Duck Egg Blue by Annie Sloan becomes storage that actually lifts the room, and the chalk finish reads softer than high-gloss against harsh basement fluorescents. Tables take more abuse. One sewer I follow used Behr Marquee in semi-gloss on her IKEA INGO hack; the finish wipes clean after thread snips and rotary-cutter nicks, and the sheen bounces what light you do have around the work surface.
Pink pegboard against white shelving adds the kind of energy a basement lacks by default. The trick is keeping the backdrop quiet enough that your fabric reads true. Watermelon pink on a table leg works because the wall behind it stays neutral. Too many saturated surfaces and the room starts to hum.
Recommended Products


STORAGE SPACE: Create fashion pieces in a breeze with a designated spot for yarn, pins, scissors, and materials in 2 rows of pegs, 2 attached storage trays, 1 large interior shelf, and a large tabletop space

FOLDING ROLLAWAY SEWING TABLE: Stylish design features a 40.50" wide tabletop with Convenient Sticker with Inch and Centimeter Marks; Perfect for spreading out and diving into a variety of creative projects, including sewing, crafting, and typing on a laptop. Overall Dimensions: 40.50" W x 20" D x 28.25" H (No Assembly Required, Ships Fully Assembled)
5. Multi-Functional Spaces

A basement sewing room almost always pulls extra weight. Mine doubles as a guest room twice a year, and the arrangement works because sewing and sleeping happen at opposite ends of the calendar, not the day. The machines sit on a desk that folds against the wall, and a curtain on a ceiling track hides the whole station in about ten seconds. Guests have never once noticed the fabric bins behind it.
The best pairings share a wall, not a schedule. Sewing alongside a home office is easier than sewing alongside a play area, because a desk chair rolls back into the same footprint a sewing chair needs. Kids and rotary cutters, on the other hand, demand rigid separation. My friend tried the playroom combo and ended up storing her iron in a locked closet.
Hiding works-in-progress is the part nobody plans for. A cutting mat slides under a bed. A dress form wheels into a corner and gets draped with a throw. Open shelving looks charming in photos, but it broadcasts chaos the second a project stalls. Closed storage, even cheap cube units with fabric bins, keeps the room ready to flip between uses without a full teardown.
The real cost is mental, not spatial. Switching modes takes about fifteen minutes of setup and breakdown, and that friction kills momentum on short evenings. If the basement is your only quiet hour after work, sharing the room with any high-traffic function will cost you more projects than you expect.
Recommended Products

【3-in-1 Folding Sewing Table】- Based on your needs, the craft workstation can be fully folded, folded on side or fully expended. When fully opened, 50 inches wide tabletop can be used to cut large fabrics, or it can be opened only halfway olded down to 31.1'' inches wide, and when not in use, it can even be easily folded down to 12.2 inches wide when both sides are facing down.
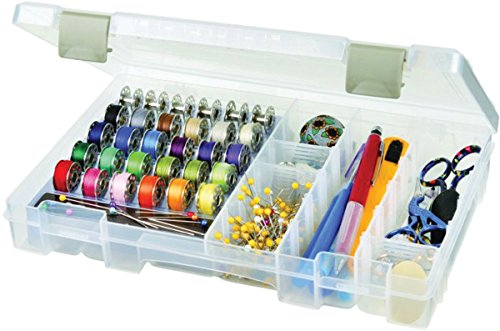
Organized Storage: The Sew-lutions Sewing Supply Box with Bobbin Storage keeps all of your small sewing supplies such as pins, needles, thread, buttons, trims, ribbons, embellishments and more organized and in one place.

CREATE YOUR IDEAL CRAFTING SPACE – Unleash your creativity with this versatile craft and sewing table, designed to inspire and accommodate all your artistic endeavors
My First Basement Sewing Setup

My first basement sewing setup started with the same excitement and the same blind spot. I had finished the basement over one summer, picked the wall color, the cabinets, the flooring, and hauled everything 48 steps down from the bonus room where my machine had lived in a back corner. The new space looked right. It just didn’t work right.
The lighting was the first thing to fail me. Basements don’t offer much to begin with, and I had relied on a single overhead fixture plus the task lamp I brought from upstairs. By November, I was sewing in a pool of shadow that shifted with the afternoon. The fix was cheaper than I expected: I added a daylight-balanced LED strip under the cabinet valance and a floor lamp with a flexible neck behind the machine. The color rendering mattered more than the brightness; fabric reads differently under warm bulbs, and matching prints under bad light means second-guessing every cut.
Storage came apart next. What contained my "hobby" stash couldn’t hold a growing inventory. Supplies migrated to the family room, then the guest room. The real problem was buying containers before I knew what I was containing. I eventually rebuilt the storage around the actual items: shallow drawers for thread so nothing buries anything else, open shelving for works in progress so I see them, closed cabinets for the bulky stuff that visual noise is made of.
The layout lesson took longest. I had arranged for the room I wished I had, not the one I did. Moving the cutting table six inches from the wall, not flush against it, let me walk around without folding the extension leaf up and down. Small basements punish every fixed decision.
Two DIY Builds That Earned Their Space

The IKEA Expedit shelving I built along the back wall turned out to be the single best use of vertical space in a basement with sloped ceilings that refuse to behave. Each cubby holds compact bins and fabric folded to a uniform width with a quilt ruler so nothing sags or flops over. The whole unit cost what the shelves cost; no extra hardware needed beyond what came in the flat pack, and assembly took an evening.
For the cutting table, I bought an INGO table and painted the frame and legs with a sample jar of Behr Marquee in semi-gloss. A sample jar runs about $3 versus $10 or more for a quart, and it covered the frame with paint to spare. Two coats after a light sanding, and the surface has held up to rotary cutters and spilled pins for two years without chipping.
The pegboard mounted nearby came from Lowe’s, painted pink and backed with 1×1 boards so it sits clear of the concrete wall. Rulers hang in reach without rattling. Between the shelves, the painted table, and the board, the three projects ate one weekend and maybe $80 total, not counting the fabric that now lives in them.
Recommended Products

Set Contains: Our 3Pcs sewing machine led light strip set contains 3PCS 12in LED strip light(5ft USB power cable), 6PCS wire retainer and 1PCS power adapter. The sewing machine light is equipped with strong self-adhesive backing and a one-touch switch button.
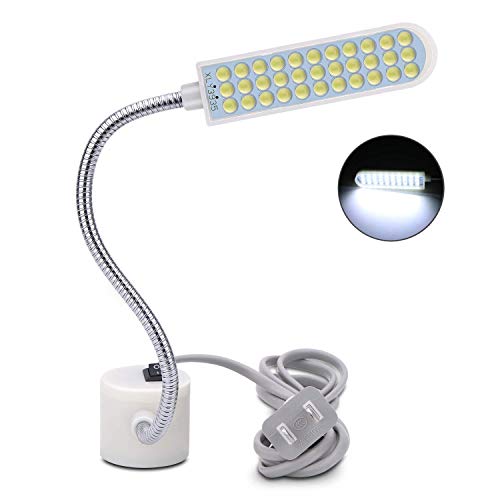
Efficient light and eye protection: The sewing machine led lights have 36 leds that help to illuminate your work area without straining your eyes,These led lights do not flash and do not pulsate.

★ SAVING MONEY: Lower Consumption and Higher Brightness, 5W LED replaces 10W-50watt halogen bulb, save up to 90% on electricity bill.
What Size Actually Means for Layout

An 8×10 foot basement corner is the smallest footprint that still functions as a sewing room. That leaves space for a machine on a compact table, a chair with clearance behind it, and one narrow storage piece. The cutting happens on the same surface you sew on, or on the floor.
A 12×12 foot room shifts things. You gain a dedicated cutting surface, usually 3×4 feet or larger, plus wall space for vertical storage and a second machine if you quilt or serge. The extra two feet in each direction sound small until you try to open a folded length of 45-inch fabric in an 8-foot span.
Joan Hawley’s setup runs about 13×20 feet, with roughly 6 feet of wall given over to combined cutting and sewing surfaces plus upper and lower cabinets. That scale allows the work zones to stay separate; fabric stays unfolded on the cutting table while a project stays loaded on the machine.
| Size | Machine station | Dedicated cutting table | Multiple machines | Built-in storage |
|---|---|---|---|---|
| 8 x 10 ft | Yes | No | No | Limited |
| 12 x 12 ft | Yes | Yes | Possible | Moderate |
| 13 x 20 ft | Yes | Yes | Yes | Upper and lower cabinets |
The 12×12 size is where most basement conversions land, and it is the point where the room stops fighting you. Anything smaller and you are scheduling your tasks; anything larger and you are furnishing a studio.
Recommended Products

Convenient USB Charging Port. The built-in USB port makes it easy to charge a phone, a tablet, or another device.

💡VERSATILE LIGHTING: 30 high-quality LED beads provide bright, even illumination with no flickering, perfect for sewing machines, craft tables, workbenches, and music stands
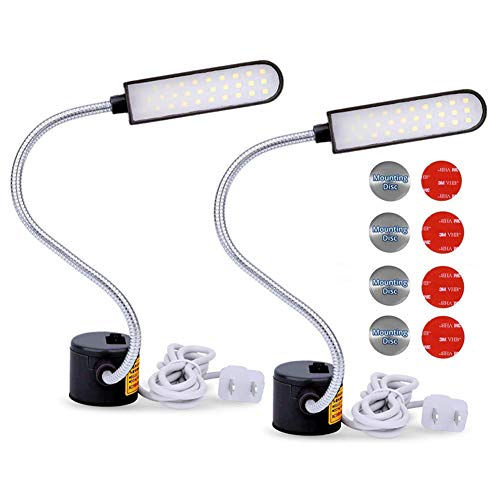
【What you Get】- You will get 2PCS magnetic led light + 2Pcs Mounting Dics + 2 Pcs 3M Sticker, which will allow you use this magnetic light at any places, except for metal surfaces. You could put them on the table, used as multi-function work desk lamp at home for learning, reading and doing handwork. Very practical and multifunctional.Multifunctional Flexible Gooseneck Arm Work Lamp with Magnetic Mounting Base forWorkbench
Frequently Asked Questions
Recommended Products

Large Capacity & Divided Storage: This folding sewing table features two detachable 3.31 lbs weight capacity storage trays, along with two storage shelves and 20 wooden pegs. With an overall weight capacity of 88 lbs, it's ideal for storing sewing materials like needles, threads, and fabrics, helping you keep your workspace organized and tidy.

STORAGE SPACE: Create fashion pieces in a breeze with a designated spot for yarn, pins, scissors, and materials in 2 rows of pegs, 2 attached storage trays, 1 large interior shelf, and a large tabletop space
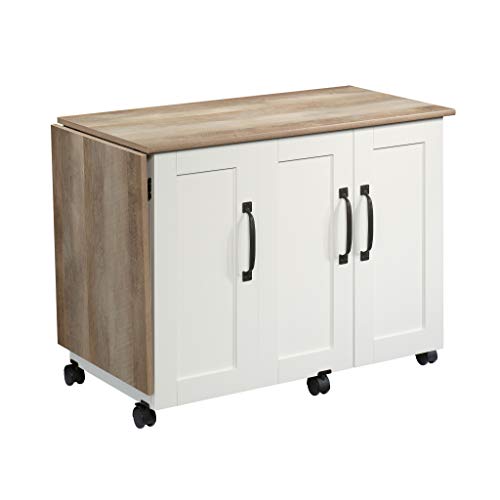
CREATE YOUR IDEAL CRAFTING SPACE – Embrace your creativity with a dedicated area for all your sewing and crafting projects, ensuring you have everything organized and within reach
How do I keep my sewing room tidy?
Dedicate five to ten minutes at the end of every session to cleanup. Scraps go straight into a trash bin kept within arm’s reach, cords get bundled before you leave, and each activity needs its own territory so the mess stays local. Labeled bins in cubbies corral small supplies, and a pegboard keeps tools visible but off your work surface.
What size should a sewing room be?
Eight by ten feet is the minimum room size that keeps basic sewing setups from feeling cramped. That leaves space for a machine on a compact table, a chair with clearance behind it, and one narrow storage piece. A 12×12 foot room is where most basement conversions land; it gives you a dedicated cutting surface and wall space for vertical storage, and the room stops fighting you.
How can I create more natural light in my sewing room?
A skylight is the least expensive and least intrusive daylight option if your basement offers no exterior wall for a window, since it cuts upward through framing that is already open. Mirrors and pale paint bounce what light you have, but they cannot replace the real thing. Place your machine where it receives the best natural light, then test that position for a few hours of actual sewing before you commit.