
A finished basement that holds 68°F through January costs between a weekend of sealing and a full heating system overhaul, depending on how wrong the original builder sized the HVAC. Most people skip the rim joist and start with a space heater, which is exactly how you end up with a $400 electric bill and the same cold floor. Seal the concrete walls and that joint where the foundation meets the framing first; the R-13 insulation you add later only works once air stops moving through it.
1. Seal Air Leaks

Cold air finds every gap a basement offers, and the gaps are usually more than people expect. The rim joist alone, where the foundation meets the framing above, can leak enough to cancel out insulation you add later. I start any warmth project there, running a bead of caulk or a line of expanding foam along that joint and any cracks in the concrete walls or floor.
Windows and doors need the same treatment. Old basement windows especially: the seals harden, frames warp, and a draft you never notice in summer becomes a steady chill by November. Exterior-grade caulk on the outside, a second line on the inside, and non-expanding foam for any gap between the frame and the rough opening. Weatherstripping on a walkout door costs little and takes ten minutes.
Pipe and wire penetrations through interior walls matter too. They look small, but cold air moves freely through them and pools where the basement is lowest. Sealing these before any other step means the insulation and heating you add later actually stays where you put it. The comfort difference is immediate, and the energy bill shows it even before the real cold sets in.
Recommended Products

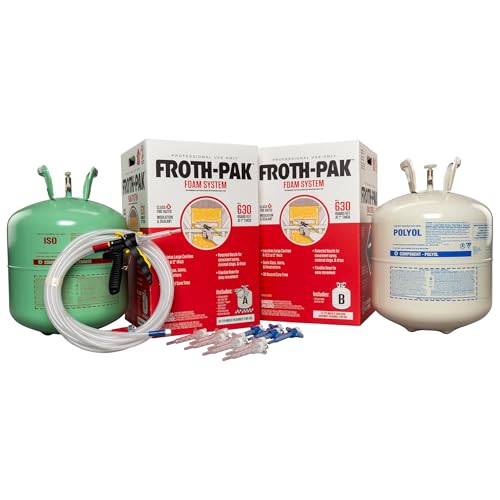
USA Manufactured: Proudly made in the USA; Note: Customer signature required

AIRTIGHT COVERAGE FOR MULTIPLE SURFACES: This diy spray foam insulation kit fills cracks, gaps, and wall junctures. Ideal for rim joists, crawl spaces, roof rafters, and around ducts to seal against air and moisture intrusion.
2. Insulate Basement Walls

Concrete walls move cold into a basement faster than most people expect, which is why sealing comes first and insulation comes second. The gaps have to be closed before the barrier goes up, because insulation only works when air isn’t moving through it.
For framed basement walls, rigid foam board cut to fit between the studs gives you the thermal break you need. Aim for R-13 to R-15 on those walls; anything less and you are still losing heat faster than your system can replace it. Spray foam works too, especially against bare block or poured concrete where framing does not exist yet. It fills the irregularities rigid board cannot reach and creates the same barrier against heat loss.
Some basements need a vapor barrier behind or over the insulation, depending on how damp the space runs. Without one, you risk trapping moisture against framing and giving mold a foothold. The finished result should feel noticeably less drafty, and the room will hold temperature without forcing your heating system to work harder.
Recommended Products

All-Weather Performance: Effective in temperatures from 23°F to 100°F (-5°C to 38°C), making it suitable for year-round use in various climates.

FILLS LARGE HOLES, GAPS & CRACKS: Ideal for insulating and preventing drafts

FILLS SMALL HOLES, GAPS & CRACKS: Ideal for insulating and preventing drafts
3. Insulate Basement Ceiling

Insulating the basement ceiling only makes sense if the space below is finished living area you actually use. For a workshop or storage zone, the money stays in your pocket and the heat stays where you want it, upstairs with the people.
When the basement is finished, the job is straightforward: insulation batts go between the joists overhead, creating a thermal barrier that separates the basement from the conditioned floors above. The target here is R-30 for ceiling insulation, the minimum that does real work keeping heat from rising straight through the floor and forcing your system to run harder.
Rigid foam board at R-13 to R-15 handles the walls between studs, but the ceiling is where the biggest heat loss happens in a finished basement. Without that R-30 separation, you’re essentially paying to warm the joist cavities while the living space below stays stubbornly cool.
Recommended Products

Upgraded Silicone Material: Compared with other EPDM foam strips on the market, silicone weather stripping has higher density, better toughness, and stronger temperature resistance, so it is more wear-resistant and has a longer service life.

Upgraded Wedge Design: This window draft stopper features an upgraded wedge design, tapering from 5/32" to 11/32" (0.16"–0.35") to fit a wide variety of gap sizes. Ideal for use on various doors and windows

【Lock in Warmth, Saves Money】 Weather stripping can effectively block cold air in winter and keeps cool air inside in summer. It perfectly fills the gaps around the door frame and window edges, maintaining a warm and comfortable home environment while reducing heating and cooling costs.
4. Improve Flooring

Concrete pulls heat from the air and from your feet the moment you step on it. Breaking that thermal bridge is the fastest way to make a basement feel warmer, even before the actual air temperature changes.
A thick area rug laid over the spots you walk most will do it. For a bigger shift, wall-to-wall carpet with a thermal pad underneath reduces heat transfer from an uninsulated slab far more than most people expect. One homeowner found their basement became comfortable enough for kids to play on the floor after adding exactly that, where before they had avoided the space despite 72-degree air.
Raised subfloor panels create a buffer zone between you and the concrete entirely. They cost more and take a weekend to install, but the result is a surface that acts like an upstairs floor.
Before buying anything, check how dry the basement stays. Carpet over damp concrete traps moisture and breeds problems. If water shows up regularly, fix that first. For a quick test, tape a square of plastic sheeting to the floor for a day; condensation underneath means the slab is bringing moisture in and you need to address it before covering anything up.
Non-slip pads matter on any rug over concrete. The surface is slick, and a rug that slides is a fall waiting to happen.
Recommended Products

Reflective Window Insulation: Our rv window insulation is well-made, which is weight of 200 g / 10.76 sqft. It is of good material and long-lasting
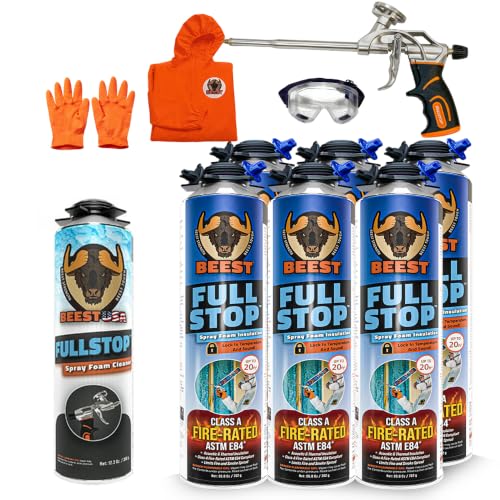
CLASS A SURFACE-BURNING PERFORMANCE + HIGH R-VALUE: BEEST FullStop was tested to ASTM E84 and achieved a Flame Spread Index of 0 and Smoke Developed Index of 120, meeting Class A surface-burning criteria. Delivers strong thermal insulation performance with an R-Value of 8.24 at 2" thickness.

CLASS A SURFACE-BURNING PERFORMANCE + HIGH R-VALUE: BEEST FullStop was tested to ASTM E84 and achieved a Flame Spread Index of 0 and Smoke Developed Index of 120, meeting Class A surface-burning criteria. Delivers strong thermal insulation performance with an R-Value of 8.24 at 2" thickness.
5. Adjust Heating System

Basement registers blowing lukewarm air while upstairs rooms roast usually means the dampers are half-closed or the system was never sized for the load below grade in the first place. Finding the damper handles takes a flashlight and a trip to the main trunk lines, often near the furnace; each lever parallel to the duct means open, perpendicular means closed. Set every basement damper fully open before you spend money on anything else.
If the house was built with the basement unfinished, the original HVAC load calculation probably ignored that square footage entirely. The furnace runs long enough to satisfy the thermostat upstairs but shuts off before downstairs air mixes to a comfortable temperature. Opening dampers and adjusting registers to direct airflow toward the coldest corners costs nothing and sometimes solves the whole problem. A ceiling fan spinning clockwise on low can push that pooled warm air back down where you actually sit.
Annual furnace maintenance matters more in an underloaded basement than in the rest of the house. A dirty filter or sluggish blower reduces what little delivered airflow there already is. Check the filter monthly in heating season; replace it when the furnace manual says to, not when it looks bad.
Recommended Products

100 PACK INSULATION SUPPORT WIRE - Each box contains 100 premium carbon steel wire supports for 16 inch on-center joist spacing. Secure batt and blanket insulation in attics, basements, and crawl spaces
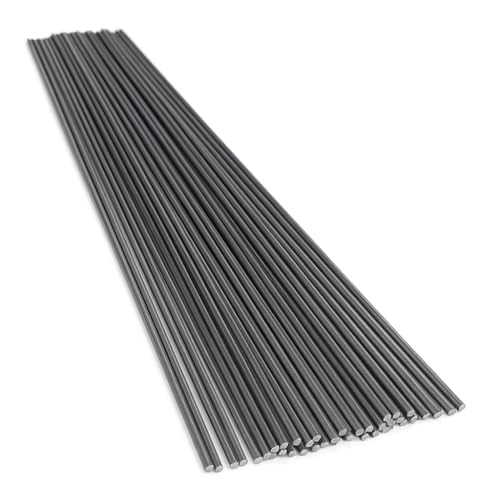
PROFESSIONAL SPRING STEEL — SUPERIOR STRENGTH & LONG-TERM SUPPORT. Made from true spring steel, offering exceptional elasticity, higher tension retention, and better long-term fatigue resistance than common high-carbon or non-spring stainless wire. Built to stay tight for years without sagging.

Yarlung value set of 250 pcs Insulation Support Wire, 16.1 inch long and 2mm diameter, ensuring consistent quality for insulation support, easy to use, save time and effort
6. Install Supplemental Heating

Electric baseboard heaters plug the gap when the upstairs furnace cannot push enough BTUs down to keep a finished room livable. The average basement in winter sits around 52.7 degrees Fahrenheit, which is cold enough to shrink a movie night into twenty minutes. Baseboard units run on their own thermostat, so the basement can hold 68°F without roasting the first floor.
Ductless heat pumps cost more upfront than baseboards, but they also cool in July and avoid the dry, blown feel of resistance heat. A mini-split mounted high on the wall needs only a three-inch hole to the outside, no ductwork to tear open. For anyone already pulling up the slab, electric radiant floor heating spreads warmth evenly across the whole footprint and stays silent, though the install runs higher and really only pays off if the floor is coming up anyway.
Recommended Products

SPRAY FOAM INSULATION (3840 Sq.Ft. - 192 Pack x 27.1 oz.) HIGH R-VALUE THERMAL & SOUNDPROOF : BONDURE spray foam insulation delivers strong thermal insulation and soundproofing to reduce drafts and improve comfort. Thanks for the closed-cell feature also optimal R-Value and at most thickness, ideal for walls, ceilings, attics, roofs, rim joists, and hard-to-reach gaps.

Low GWP Formula & U.S. Shipping Eligible – Designed with a low Global Warming Potential (GWP) formulation. Meets applicable regulatory requirements and ships to most U.S. states.

Low GWP Formula & U.S. Shipping Eligible – Designed with a low Global Warming Potential (GWP) formulation. Meets applicable regulatory requirements and ships to most U.S. states.
7. Use Thermal Curtains

Thermal curtains sit near the end of the job, after the insulation and sealing are done, but they finish the work in a way you can feel immediately. Basement windows are often single-pane and sit right at ground level where cold air pools, so the heat loss through glass down there is sharper than it is upstairs. Heavy fabric with a thermal lining blocks that transfer and stops drafts that slip past old frames.
A set in a neutral weave runs about $30–$60 per window and hangs on a standard rod you probably already own. The benefit is comfort you notice right away, not months later on a utility bill. After spending a weekend on the hard stuff, this is the twenty-minute step that makes the room feel finished.
Recommended Products

Max Fill Maximum Expanding Foam Sealant seals out drafts and moisture from gaps and cracks in foundations, crawlspaces, attics, basements and other such areas

Powerful and Long-Lasting Seal: Strengthen your home’s defenses with Stanley Block Spray Foam, a high-expansion formula that seals gaps and cracks from 1" to 3". Ideal for use around doors, windows, pipes, and wall openings to create a secure and protected environment.

The information below is per-pack only
Heating Options Compared

Ductless heat pumps pull the most weight for year-round use, but the basement’s footprint and your budget shape what actually makes sense. A heat pump runs higher upfront than portable units, yet still lands below the cost of tearing out a floor for radiant heat.
| System | Efficiency | Cost | Install Complexity | Best For |
|---|---|---|---|---|
| Ductless heat pump | High | Higher | Moderate | Permanent, all-season solution |
| Electric radiant floor | Moderate | Lower install, higher to run | Easier | Small areas, occasional use |
| Hydronic radiant floor | High | Higher | Complex | New builds or full remodels |
| Electric space heater | Low | Low | None | Spot heating, temporary |
| Baseboard heater | Moderate | Moderate | Simple | Supplemental, zoned rooms |
| Gas wall heater | Moderate | Moderate | Moderate | Where gas lines exist |
| Electric fireplace | Low | Low to moderate | Simple | Ambiance, mild supplemental heat |
Electric radiant floor heating uses wires embedded in the flooring and is easier to install, though it costs more to run over time. Hydronic radiant floor heating circulates hot water through pipes under the floor, pricier and more labor-intensive to set up but more efficient for heating larger spaces long-term. Portable electric heaters work safely for small zones or short stints, not as a primary source.
Recommended Products
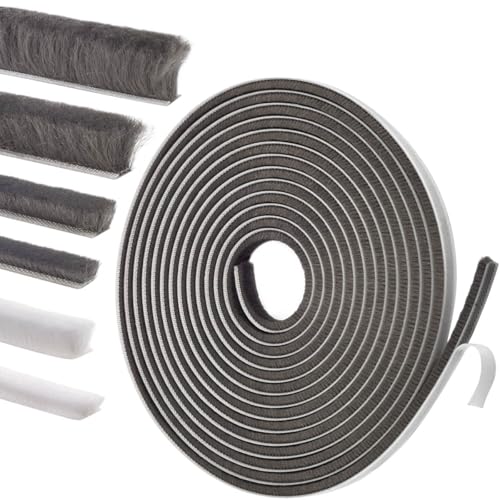
ALL-WEATHER DURABLE DOOR & WINDOW SEAL - Crafted from premium, weather-resistant materials, YOCCEK door weather stripping effectively seals gaps around door bottoms, jambs, and window edges to block drafts and moisture in any season.

Upgraded Wedge Design: This window draft stopper features an upgraded wedge design, tapering from 5/32" to 11/32" (0.16"–0.35") to fit a wide variety of gap sizes. Ideal for use on various doors and windows

ALL-WEATHER DURABLE DOOR & WINDOW SEAL - Crafted from premium, weather-resistant materials, YOCCEK door weather stripping effectively seals gaps around door bottoms, jambs, and window edges to block drafts and moisture in any season.
Moisture Control

A basement that smells musty already tells you the air is holding too much water. That moisture pulls heat away from skin faster than dry air does, so the room feels colder than the thermostat claims. Running a dehumidifier to pull relative humidity below 60 percent does more for comfort than cranking the heat, and it keeps mold from colonizing the joist bays.
Exhaust fans or vents keep air moving when windows stay shut against winter cold. A whole-home HVAC system with humidity control handles both temperature and moisture together, which matters because wet insulation loses its R-value and becomes a breeding ground.
For basements that take on water, a sump pump is the first defense, and a battery-operated backup pump sits ready for the same storm that knocks out power. Without that backup, the primary pump quits exactly when you need it most.
Recommended Products
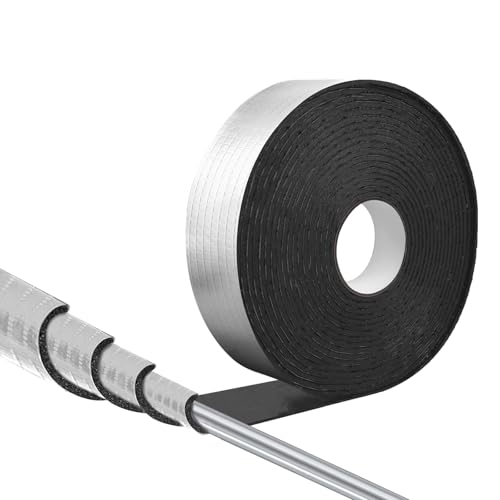
Premium Material: our outdoor pipe insulation rolls are constructed with 0.2-inch thick rubber and plastic wool, which protects the water pipes from high temperatures and strong sunlight in the summer, and retains heat in the winter to protect the outdoor pipes from freezing

Name: Pipe Insulation Foam Tube;Length: 1.8m / 6Ft; Color: Black;
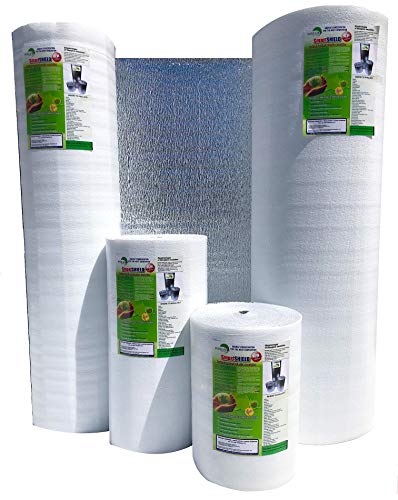
EXTREMELY EFFECTIVE - reflect 95% of radiant energy, perfect RADIANT BARRIER.
Quick Fixes for Immediate Warmth

Cement floors pull heat out of a room faster than anything else in the house, and in my basement that meant socks alone were never enough. A thick rug with a non-slip pad underneath bought me instant comfort on a Saturday morning, no tools required. For the windows, thermal curtains added a buffer I could feel when I sat nearby, though they matter less if the frame itself leaks air.
Portable electric heaters filled the gap where the main vent could not. The small ceramic unit I set near the couch ran about 1500 watts, enough to keep one corner livable while I figured out the real heating plan. I only used it with automatic shut-off and tip-over protection, and only while I was in the room; the fire risk is real in a space with limited airflow, and the electric bill climbs fast if you lean on it daily.
The ceiling fan trick surprised me. Reversing the blade direction to clockwise pushes warm air back down instead of pulling it up, and in my low-ceilinged basement that made a noticeable difference within an hour. These four fixes together made the space usable through a winter I had not planned for, bought with a weekend and a few hundred dollars instead of the full renovation I eventually scheduled for spring.
Recommended Products
24" Insulation Supports: Designed for securing batt and roll insulation, these wire insulation support provide a strong, long-lasting hold between joists; preventing sagging and improving overall insulation performance

Package include:You will receive 50pcs 16 inch insulated brackets,with a diameter of 0.08 inches.Enough to meet your various uses and replacement needs

Package Included: You will receive 150 pieces of 24 inch insulation support wire, the carbon steel wire diameter of 0.08 inches/ 2 mm, sufficient quantity to satisfy your various purposes and replacement needs
What I Would Do Differently

The first mistake I made was turning on a space heater the same weekend I started the project. Warm air rose straight through the rim joists I had not sealed yet, and the electric bill that month was enough to buy the caulk gun I should have started with. Seal first, then heat. The second was buying a standard rug pad for the concrete floor. Two weeks later it smelled like a wet dog had moved in; moisture wicking up through the slab had turned the jute backing into mildew. Polyurethane foam pads made for concrete cost more, but the difference is the price of not redoing it. I also assumed the HVAC contractor had sized the system for finished basement square footage. They had not. The existing ducts pushed barely enough air for storage, not living space, and adding a vent without checking static pressure just made the upstairs bedrooms cold. If I were starting over, I would budget for a Manual J load calculation before buying a single register.
Materials and Tools

Most basements need three kinds of sealing material before any insulation goes in. Caulk works for narrow gaps around windows and doors; expanding foam fills larger cracks in concrete walls and the sill plate. A moisture barrier belongs between the concrete and anything organic, because the passages make clear that vapor management prevents mold growth behind finished walls.
For the walls themselves, the choice sits between rigid foam board and spray foam. Rigid foam with an R-value of R-13 to R-15 fits between studs if the wall is already framed. Spray foam works directly against bare block or poured concrete, creating the thermal barrier that reduces heat loss through the structure.
The ceiling needs batts rated at minimum R-30 to stop warm air from rising into the floor above. On the floor, a rug pad rated specifically for concrete keeps area rugs from turning the cold slab into a damp, musty problem. Throw rugs add warmth, but only in dry basements; skip them if moisture shows up anywhere.
Frequently Asked Questions
What is the best way to heat a chilly basement?
A ductless heat pump is the most efficient year-round option, providing both heating and cooling through a three-inch wall penetration without ductwork. Electric radiant floor heating spreads warmth evenly and silently, though it only pays off if you are already pulling up the slab. Baseboard heaters work well as supplemental heat for zoned rooms, running on their own thermostat so the basement can hold 68°F without overheating the floor above.
How can I keep my basement warm in winter?
Seal air leaks first, especially at the rim joist where the foundation meets the framing, then insulate walls to R-13 or R-15 and ceilings to R-30 if the space is finished living area. Open all basement dampers fully and run a ceiling fan clockwise on low to push warm air back down. Add thermal curtains over windows and thick rugs with non-slip pads over concrete floors for immediate comfort.
What are some quick fixes to warm up a cold basement?
Lay a thick rug with a non-slip pad over the concrete spots you walk most; the thermal break makes the room feel warmer before the air temperature even shifts. Hang thermal curtains on basement windows for about $30–60 each to block heat loss through single-pane glass. Run a portable ceramic heater with automatic shut-off and tip-over protection in the corner you use, and reverse your ceiling fan to clockwise on low to push pooled warm air back down where you sit.